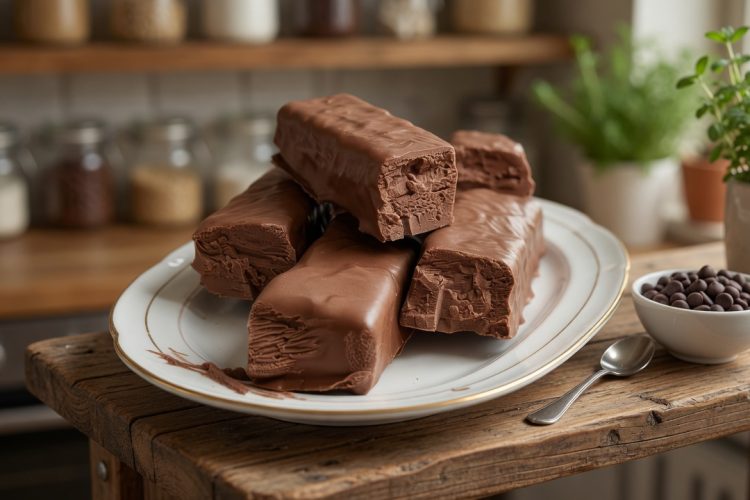
Creating your own version of coconut chocolate bars means you control exactly what goes inside. This keto-friendly recipe recreates the classic candy bar using unsweetened coconut, sugar-free sweetener, and dark chocolate with no added sugar. The bars take about 20 minutes of hands-on work, then just need time to chill before eating. You get the same sweet coconut center covered in dark chocolate that made the original famous, but without the 20-plus grams of sugar found in store-bought versions. Each homemade bar contains only 3 grams of net carbs, making them suitable for ketogenic diets and low-carb eating plans.
Why These Bars Work for Keto Diets
Traditional candy bars create problems for people limiting carbohydrates because they contain refined sugar and corn syrup. One regular coconut chocolate bar has around 27 grams of total carbohydrates, which uses up most or all of the daily carb allowance on keto diets. This recipe solves that problem by using erythritol or monk fruit sweetener instead of sugar. These sweeteners don’t raise blood sugar and have minimal impact on insulin levels. The coconut provides healthy fats and fiber, while dark chocolate adds antioxidants. Together they create a satisfying treat that fits into ketogenic macros without kicking you out of ketosis or causing blood sugar spikes.
Picking the Right Coconut
The type of coconut you use affects both texture and moisture content. Unsweetened shredded coconut works best because it contains no added sugar and has the right texture for forming bars. Avoid sweetened coconut, which adds unnecessary carbohydrates and makes the filling too sweet even with additional sweetener. Look for medium or finely shredded coconut rather than large flakes, which don’t stick together as well. Some recipes call for coconut flour, but that creates a completely different texture. You want actual coconut pieces that provide the chewy, fibrous texture characteristic of coconut candy bars. Most grocery stores carry unsweetened shredded coconut in the baking aisle or natural foods section.
Getting Coconut Cream Right
Coconut cream differs from coconut milk in important ways. Full-fat canned coconut milk separates when cold, with thick cream rising to the top and watery liquid settling at the bottom. For this recipe, you only want the thick cream portion. Put a can of full-fat coconut milk in the refrigerator overnight, then scoop out just the solidified cream at the top. This thick cream binds the coconut together without making the filling soggy. You can also buy coconut cream sold separately, which costs more but saves the step of separating it yourself. Avoid light coconut milk or coconut water, both too thin to create the right consistency.
Choosing Your Sweetener
Powdered sweeteners work much better than granulated versions in no-bake recipes. Granulated erythritol or other sugar substitutes don’t dissolve well in the coconut mixture, leaving a gritty texture. Powdered erythritol, also called confectioners erythritol, dissolves smoothly and creates the right sweetness without any unpleasant texture. Powdered monk fruit sweetener works the same way. You can make your own powdered sweetener by grinding granulated versions in a coffee grinder or high-speed blender for about 30 seconds. Some brands sell blends that combine erythritol with stevia or monk fruit. These work fine, just check the conversion ratio since they may be sweeter than pure erythritol.
Selecting Sugar-Free Chocolate
Finding good sugar-free chocolate makes a real difference in how your finished bars taste. Look for chocolate labeled 85% cocoa or higher, which contains very little sugar naturally. Some brands make chocolate specifically for keto diets using erythritol or stevia as sweetener. These products melt smoothly and taste sweet without sugar. Check ingredient lists carefully because some “sugar-free” chocolate contains maltitol, which affects blood sugar more than other sugar alcohols. Dark chocolate with 90% or 100% cocoa contains virtually no sugar but tastes quite bitter. You can use it and adjust sweetness by adding a bit of powdered sweetener to the melted chocolate.
Mixing the Filling Properly
Getting the coconut mixture to the right consistency takes some attention. Start by combining the dry ingredients first, which means mixing the shredded coconut with powdered sweetener and salt. This distributes the sweetener evenly before adding wet ingredients. When you add the coconut cream, melted coconut oil, and vanilla, the mixture will look dry at first. Keep folding everything together with a spatula, pressing and squeezing to help the coconut absorb the liquid. After a few minutes of mixing, it should become sticky and moldable. The mixture needs to hold together when you squeeze it but shouldn’t feel greasy or wet. This texture allows you to shape bars that keep their form during freezing and chocolate coating.
Shaping Bars That Hold Together
The way you form the coconut filling affects whether bars stay intact or fall apart. Measure about 2 tablespoons of mixture for each bar to keep sizes consistent. Place the mixture in your palm and squeeze firmly while shaping into a rectangle. Pressing hard compacts the coconut so it sticks together rather than crumbling. Traditional coconut bars have rounded edges and corners rather than sharp angles. You can achieve this by rolling the shaped rectangle gently between your palms. Some people prefer making logs instead of rectangles, which also works fine. Whatever shape you choose, make sure each piece is firmly packed. Loose, lightly pressed bars tend to break when you dip them in chocolate.
Why Freezing Before Coating Matters
Putting the shaped bars in the freezer serves an important purpose beyond just firming them up. Cold bars hold their shape when you dip them into warm melted chocolate, while room temperature bars tend to soften and fall apart. The filling also absorbs less chocolate when it’s cold, creating a thinner, crisper coating. Freeze the bars for 30 to 45 minutes, which makes them firm without freezing them completely solid. Bars that are frozen too hard can cause the chocolate coating to crack as they warm up. The goal is cold and firm but not rock-hard. If you accidentally freeze them too long, let them sit at room temperature for a few minutes before dipping.
Melting Chocolate Without Problems
Chocolate can be tricky to melt because it burns easily and seizes when it gets too hot or comes into contact with water. The double boiler method provides gentle, even heat by using steam rather than direct flame. Make sure the water in the bottom pan doesn’t touch the bowl holding the chocolate. Stir constantly as the chocolate softens to distribute heat evenly. The microwave works faster but requires more attention. Use 20-second intervals at medium power, stirring after each heating. Stop heating while a few small chunks remain because residual heat will melt them. Adding coconut oil to melted chocolate thins it slightly, making it easier to create a smooth, even coating on each bar.
Coating Techniques for Clean Results
Dipping bars in chocolate takes a gentle touch to avoid breaking the coconut filling. Use a fork to hold each bar, lowering it into the melted chocolate until completely submerged. Use a spoon to pour chocolate over any exposed areas. Lift the bar and hold it above the bowl, tapping the fork gently against the rim. This removes excess chocolate so you get a thin coating rather than a thick, heavy layer. Slide the coated bar onto parchment paper using another fork or knife to push it off. Work quickly but carefully, doing one bar at a time. If chocolate starts thickening as it cools, briefly rewarm it. A thin coating hardens better and gives you that satisfying snap when you bite through the chocolate shell.
Dealing with Common Coating Issues
Several things can go wrong when coating bars, but each has a simple fix. Chocolate that looks dull or chalky rather than shiny usually means it cooled too fast or got too hot during melting. Tempering chocolate properly creates shine, but for simple home recipes, melting gently and letting bars set slowly in the refrigerator works fine. Cracks in the chocolate coating happen when bars are too cold or the chocolate was too thick. Let frozen bars warm slightly before dipping and thin chocolate with coconut oil. Coconut filling that shows through the chocolate means your coating is too thin or you didn’t cover all surfaces. Make sure to spoon chocolate over every exposed spot before lifting the bar from the bowl.
Adding Different Flavors
The basic recipe works beautifully, but small changes create new variations. Adding a whole almond inside each bar gives you something like an Almond Joy. Place the almond in the center of the coconut mixture before shaping it around the nut. Toasting the shredded coconut in a dry skillet before mixing brings out deeper, nuttier flavors. Watch carefully and stir constantly since coconut burns quickly. For chocolate coconut bars, mix unsweetened cocoa powder into the filling. Citrus zest from lemon or orange adds bright notes that cut through the richness. A tiny pinch of espresso powder in the chocolate coating deepens the chocolate flavor without making it taste like coffee.
How Long These Bars Keep
Proper storage keeps your homemade bars fresh for weeks. Once the chocolate coating hardens completely, transfer bars to a container with a tight lid. Put parchment or wax paper between layers to prevent sticking. Stored in the refrigerator, the bars stay fresh for about two weeks. The chocolate may develop a white coating called bloom if temperature fluctuates, but this doesn’t affect safety or taste. For longer storage, freeze the bars in a freezer-safe container or bag for up to three months. Frozen bars can be eaten straight from the freezer for a firmer texture, or let them sit at room temperature for five to ten minutes for a softer bite.
Nutritional Benefits Beyond Low Carbs
These bars provide more than just low carbohydrate content. Coconut contains medium-chain triglycerides, a type of fat that your body processes differently than other fats. MCTs get converted into energy quickly rather than being stored as body fat. Dark chocolate provides flavonoids and antioxidants that support heart health and reduce inflammation. The healthy fats from coconut and chocolate help keep you satisfied between meals. Unlike sugar-filled candy bars that cause energy crashes, these keto bars provide steady energy without blood sugar spikes. Each bar delivers about 13 grams of fat, making them useful for hitting daily fat targets on ketogenic diets.
Serving Ideas for Different Occasions
These coconut chocolate bars work in many situations beyond a simple snack. Pack them in lunch boxes for a sweet treat that won’t derail healthy eating goals. Serve them on dessert platters at parties alongside other keto-friendly sweets. They make excellent gifts when wrapped individually in parchment paper and tied with ribbon. Keep a few bars in your desk or bag for emergency snacks when hunger strikes. They pair beautifully with coffee or tea for an afternoon pick-me-up. Cut bars into smaller pieces to serve as petit fours at dinner parties. The bars travel well without melting if kept cool, making them good options for picnics or road trips during cooler months.
Questions People Often Ask
Many people wonder if they really need to use powdered sweetener or if granulated works just as well. Powdered sweetener truly does create better texture because it distributes evenly and doesn’t leave gritty bits. You can make powdered from granulated by blending it, so there’s no reason to use granulated and compromise texture. Another common question involves substituting other fats for coconut oil. You can use butter or ghee in the filling, though this changes the flavor slightly. The chocolate coating should still use coconut oil since it helps create the right consistency and keeps the recipe dairy-free. Some ask about making larger batches, which works perfectly. Just double or triple all ingredients and you’ll have bars for weeks.
Using What You Have on Hand
Not everyone keeps specialty keto chocolate in their pantry, but you can work with what’s available. Regular dark chocolate with 70% cocoa or higher keeps carbs relatively low even though it contains some sugar. One bar made with 70% chocolate will have slightly more carbs but still far less than store-bought candy. If you only have chocolate chips, those work fine for coating. Some people use sugar-free chocolate chips made with stevia, which melt smoothly and taste good. Unsweetened baking chocolate is another option, though you’ll need to add extra sweetener since it contains no sugar at all. Mix a tablespoon or two of powdered sweetener into melted unsweetened chocolate to balance the bitterness.
Making Smaller or Larger Bars
The recipe gives measurements for standard-sized bars, but you can adjust to your preference. Using just one tablespoon of coconut mixture creates bite-sized treats perfect for portion control. Roll them into balls instead of bars for coconut truffles. These smaller pieces are easier to coat since you can drop them in chocolate and remove them with a fork. Larger bars using three or four tablespoons of filling make more substantial servings. Keep in mind that bigger bars need longer in the freezer to firm up properly and require more chocolate for coating. Very large bars also become harder to handle during dipping and more likely to break. Most people find the two-tablespoon size hits the sweet spot between substantial and manageable.
Why This Recipe Beats Store-Bought Options
Making coconut chocolate bars at home gives you several advantages over buying them. You save money since a batch of sixteen bars costs less than buying the same number of low-carb candy bars at the store. You know exactly what’s inside, avoiding hidden sugars, preservatives, and ingredients you can’t pronounce. Homemade bars taste fresher because you’re eating them within days or weeks of making them rather than after months of shelf time. You can customize flavors and sweetness levels to match your preferences. The bars contain higher quality ingredients than most commercial keto candies. When you make them yourself, you also avoid the disappointment of paying premium prices for specialty diet foods that don’t taste very good.
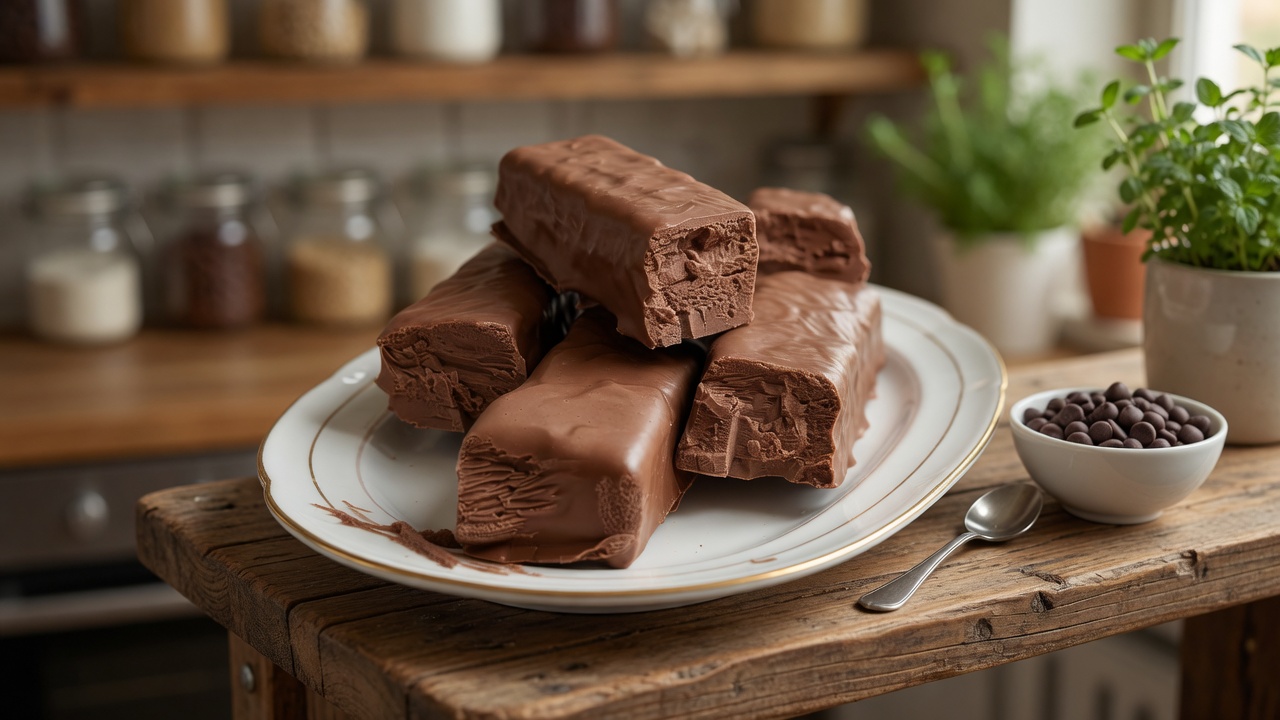
Sugar-Free Coconut Chocolate Bars
Homemade low-carb candy bars with a sweet coconut filling wrapped in sugar-free dark chocolate. These keto-friendly treats taste like classic coconut bars but contain only 3 grams of net carbs per serving and no added sugar.
30
minutes40
minutes135
kcal1
hour10
minutesIngredients
- For the coconut filling:
2½ cups unsweetened shredded coconut
½ cup full-fat coconut cream (thick portion only)
¼ cup powdered erythritol or powdered monk fruit sweetener
2 tablespoons melted coconut oil
1 teaspoon vanilla extract
¼ teaspoon fine sea salt
- For the chocolate coating:
200 grams sugar-free dark chocolate (85-100% cocoa or keto chocolate)
1 tablespoon coconut oil
Directions
- Make the filling: In a large bowl, combine shredded coconut, powdered sweetener, and salt. In a separate bowl, mix coconut cream, melted coconut oil, and vanilla extract. Pour the wet ingredients into the coconut and stir until everything becomes sticky and holds together when squeezed.
- Shape the bars: Line a baking tray with parchment paper. Take about 2 tablespoons of coconut mixture and press firmly into a rectangular bar shape. Repeat with remaining mixture to make 16 bars. Place bars on the prepared tray.
- Freeze until firm: Put the tray in the freezer for 30 to 45 minutes until bars are firm but not completely frozen solid.
- Melt the chocolate: Place dark chocolate in a heat-safe bowl. Melt using a double boiler or microwave in 20-second intervals, stirring between each heating. Once melted, stir in the coconut oil until smooth.
- Coat the bars: Remove bars from freezer. Using a fork, dip each bar into melted chocolate, turning to coat all sides. Lift and tap fork gently on the bowl edge to remove excess chocolate. Place coated bars back on parchment paper.
- Chill and serve: Refrigerate coated bars for 20 to 30 minutes until chocolate hardens completely. Store in an airtight container in the refrigerator for up to 2 weeks or freeze for up to 3 months.
Nutrition Facts
- Calories: 135kcal
- Fat: 13g
- Carbohydrates: 7g
- Fiber: 4g
- Sugar: 1g
- Protein: 2g


