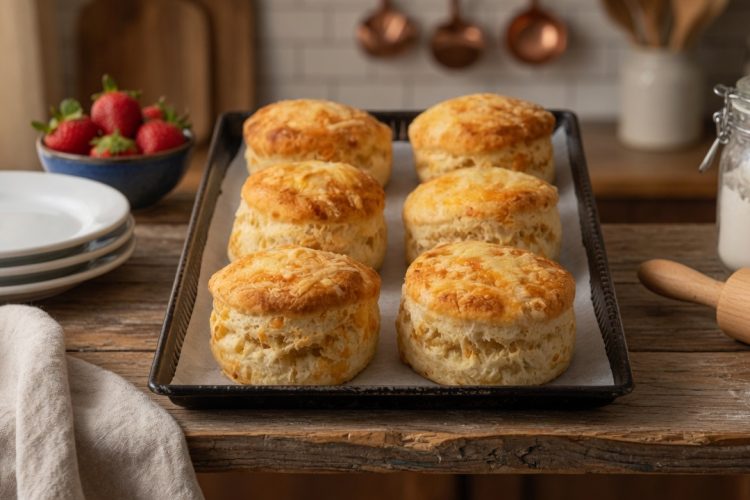
Making fresh cheese scones at home doesn’t have to take all morning or require advanced baking skills. With an air fryer, you can have warm, golden scones ready in about nine minutes total, which makes them perfect for busy weekday breakfasts or last-minute additions to any meal. These scones have a crispy outer layer that gives way to a soft, fluffy inside packed with melted cheddar cheese. The recipe uses basic ingredients you probably already have in your kitchen, and the simple mixing method means even people who have never baked before can succeed on their first try.
Why Air Fryers Make Better Scones Faster
Traditional oven-baked scones take fifteen to twenty minutes to bake after you’ve already spent time preheating the oven, which can add another ten minutes. Air fryers heat up much faster and cook food more quickly because they circulate hot air around everything in the basket. This means your scones get that beautiful golden brown color on all sides while staying tender in the middle. The circulating air creates a texture that’s somewhere between oven-baked and fried, giving you crispy edges without needing to deep fry anything. Using an air fryer also keeps your kitchen cooler since you’re not heating up a large oven, which is especially nice during warm weather.
Understanding the Simple Ingredient List
This recipe keeps things basic so you can make scones whenever the craving hits without needing to shop for special items. All-purpose flour forms the structure of the scones and provides the base that holds everything together. Baking powder acts as the rising agent, creating air pockets that make the scones light and fluffy instead of dense and heavy. A pinch of salt enhances all the other flavors, while garlic powder, paprika, or dried herbs add extra taste without requiring fresh ingredients. Shredded cheddar cheese provides rich, savory flavor and creates pockets of melted cheese throughout each scone. Milk binds the dry ingredients together and creates the dough consistency you need for shaping.
Choosing the Right Cheese for Maximum Flavor
While this recipe calls for cheddar cheese because it melts beautifully and has a strong flavor that stands up well to baking, you can experiment with many different cheese varieties. Sharp cheddar gives you the most pronounced cheese taste, while mild cheddar creates a gentler flavor that some people prefer. Pre-shredded cheese from the store works fine, but freshly shredded cheese from a block melts better because it doesn’t contain the anti-caking agents that manufacturers add to bagged cheese. If you want to try something different, mozzarella creates stretchy, gooey pockets, pepper jack adds spicy heat, or a combination of cheddar and parmesan delivers complex, nutty notes.
Mixing the Dough Without Overworking It
The way you handle the dough makes a significant difference in the final texture of your scones. When you mix the dry ingredients with the wet ingredients, you want to stir just until everything comes together into a shaggy dough. Overmixing develops the gluten in the flour, which creates tough, chewy scones instead of tender, crumbly ones. The dough should look somewhat rough and feel slightly sticky rather than perfectly smooth. If you’re used to making bread dough that gets kneaded for several minutes, you need to resist that urge here. Gentle handling and minimal mixing produce the best results, so stop stirring as soon as you no longer see dry flour.
Adding Milk Gradually for Perfect Consistency
Humidity, altitude, and even the specific brand of flour you use can affect how much liquid your dough needs. This is why the recipe tells you to add milk gradually instead of pouring it all in at once. Start with most of the milk, stir it in, and then assess whether you need the remaining amount. The dough should hold together when you press it but still feel soft and slightly tacky to the touch. If the mixture looks dry and crumbly with loose flour that won’t incorporate, add more milk one tablespoon at a time. If it becomes too wet and sticks to your hands excessively, sprinkle in a bit more flour until you reach the right balance.
Shaping Scones for Even Cooking
After you’ve mixed your dough, you need to shape it in a way that allows even cooking in the air fryer. Patting or rolling the dough to about three-quarters of an inch thick ensures the scones cook through to the center without burning on the outside. Using a round cutter creates uniform shapes that cook at the same rate, but you can also just divide the dough into six equal portions and shape them by hand into rustic rounds. Try to make each scone approximately the same size so they all finish cooking at the same time. If some scones are much thicker than others, the thin ones might overcook while the thick ones stay raw in the middle.
Preheating Your Air Fryer for Best Results
Just like with traditional ovens, preheating your air fryer before adding food helps achieve consistent results. Taking a few minutes to let the air fryer reach the target temperature of 375 degrees Fahrenheit means the scones start cooking immediately when you place them in the basket. This quick initial heat helps the baking powder activate rapidly, which creates better rise and a lighter texture. Preheating also helps the outside of the scones develop that appealing golden color and slight crispness that makes them so enjoyable. Most air fryers heat up in just three to five minutes, so this step doesn’t add much time to your total preparation.
Arranging Scones in the Air Fryer Basket
Proper placement in the air fryer basket is crucial for even cooking. The way air fryers work depends on hot air circulating completely around the food from all directions. If you crowd the scones too close together or stack them on top of each other, the air can’t flow properly, which results in uneven cooking with some areas overdone and others underdone. Leave at least half an inch of space between each scone so air can reach all surfaces. If your air fryer basket is small and can’t fit all six scones with proper spacing, cook them in two batches rather than cramming them all in at once.
Flipping Halfway Through for Even Browning
Unlike oven baking where heat comes primarily from the bottom, air fryers have heating elements that can be positioned differently depending on the model. Flipping the scones halfway through the cooking time ensures both the top and bottom get equal exposure to the heat, which creates even browning on all sides. After the first three minutes, carefully open the air fryer basket and use tongs or a spatula to flip each scone over. They might still be quite soft at this point, so handle them gently to avoid breaking them apart. After flipping, the second three-minute cooking period finishes the job and creates that beautiful golden color all over.
Recognizing When Scones Are Perfectly Done
Knowing when your scones have finished cooking prevents both underbaking and overbaking. Properly cooked scones should be golden brown on the outside with a firm surface that springs back slightly when you press it gently. If you break one open, the inside should look fully cooked rather than doughy or wet. The cheese should be melted throughout, and you shouldn’t see any raw flour streaks. Because air fryer models vary in their exact temperatures and cooking patterns, your scones might be done in slightly less or slightly more than six minutes total. Start checking them after five minutes to avoid overcooking, especially the first time you make this recipe.
Customizing with Herbs and Add-Ins
Once you’ve mastered the basic recipe, adding extra ingredients creates new flavor combinations that keep things interesting. Fresh or dried herbs like rosemary, thyme, oregano, or basil complement the cheese beautifully and add aromatic notes. Chopped fresh chives or green onions provide mild onion flavor and little green specks that make the scones look more appealing. Crispy bacon pieces add smoky, salty flavor and a bit of crunch. Diced jalapeños or a pinch of cayenne pepper create spicy scones for people who like heat. Sun-dried tomatoes contribute tangy, concentrated tomato taste. You can mix and match these additions based on what you have available or what sounds good to you.
Serving Scones While They’re Still Warm
These cheese scones taste best when served warm, shortly after they come out of the air fryer. The cheese is still melty at this point, and the texture is at its peak with a crispy outside and soft inside. Simple butter melting into a warm scone is hard to beat, but you can also spread cream cheese, jam, or honey on them. They make an excellent side for soups, stews, and chili because they’re sturdy enough to soak up broth without falling apart. For breakfast, serve them alongside scrambled or fried eggs and fresh fruit. They also work well as part of a brunch spread with other baked goods and fresh salads.
Storing Leftovers for Later Enjoyment
If you have scones left over, storing them properly helps maintain their quality so you can enjoy them later. Once the scones have cooled completely to room temperature, place them in an airtight container or resealable plastic bag. They’ll stay fresh at room temperature for about two days, though they’ll gradually lose their crispy exterior and become softer. Refrigerating them extends their freshness to about five days, which is helpful if you made a large batch. For the longest storage, freezing works wonderfully. Wrap each scone individually in plastic wrap or aluminum foil, then place all the wrapped scones in a freezer bag. They’ll keep for up to two months frozen.
Reheating to Restore Fresh-Baked Texture
While you can eat leftover scones cold or at room temperature, reheating them brings back much of their original texture and makes them taste nearly as good as when they were first made. The air fryer is perfect for reheating because it crisps up the outside while warming the inside, which the microwave can’t do. Just place the scones in the air fryer basket and heat at 350 degrees Fahrenheit for one to two minutes until warmed through. If you’re reheating frozen scones, they can go straight from the freezer to the air fryer without thawing, though they’ll need an extra minute or two. The oven also works for reheating, though it takes longer to preheat and heat the scones through.
Making Larger Bakery-Style Scones
If you prefer bigger, taller scones like you might buy at a coffee shop or bakery, you can easily adapt this recipe. Simply double all the ingredient amounts, which gives you enough dough to make larger portions. Instead of patting the dough to three-quarters of an inch thick, make it about one and a half inches thick for substantial height. Cut or shape the dough into larger rounds, keeping in mind that you’ll probably only fit three or four in your air fryer basket at once. These bigger scones need longer cooking time, so add about three extra minutes, checking them after eight minutes total and continuing until they’re cooked through. The result is impressive tall scones with lots of fluffy interior.
Troubleshooting Common Problems
Sometimes scones don’t turn out quite right, but understanding what went wrong helps you fix it for next time. If your scones are too dense and heavy, you probably overmixed the dough or didn’t use enough baking powder. Dense scones can also result from packing the flour too tightly when measuring, so spoon it into the measuring cup and level it off rather than scooping directly from the bag. If the scones spread too much and become flat, the dough was too wet or warm. If they’re too dry and crumbly, you didn’t add enough milk. Uneven browning usually means the scones were crowded in the basket or you forgot to flip them halfway through.
Trying Different Flavor Combinations
The basic cheese scone recipe serves as a starting point for countless variations that suit different tastes and occasions. For an Italian-inspired version, use mozzarella and parmesan cheese with dried oregano and basil. Mexican-style scones might include pepper jack cheese, diced jalapeños, and cumin. A French approach could feature gruyere cheese with fresh thyme. For something more British, add strong cheddar with mustard powder and a pinch of cayenne. Breakfast scones could include cheddar, crispy bacon, and chives. Each variation follows the same simple method while creating completely different flavor experiences, so you can make these scones regularly without getting bored.
Understanding Why This Recipe Works
The success of these scones comes from the way the ingredients work together and the cooking method. Baking powder releases carbon dioxide when it gets wet and when it heats up, which creates bubbles that make the dough rise and become fluffy. The flour provides structure that holds the shape while the milk adds moisture and helps create tenderness. Cheese contributes fat, which makes the scones rich and adds flavor. The high heat of the air fryer sets the outside quickly, which traps steam inside and helps the scones rise while creating a crispy crust. Minimal mixing keeps the gluten from developing too much, which maintains a tender rather than tough texture.
Adjusting Recipe Size for Your Needs
This recipe makes six small scones, which is perfect for two to three people or a small family. If you need more scones, you can easily multiply the recipe by one and a half or two times to make nine or twelve scones. Keep in mind that you’ll need to cook them in multiple batches since they won’t all fit in the air fryer basket at once. If you’re cooking for just one or two people and don’t want many leftovers, you can cut the recipe in half to make three scones. The cooking time stays the same regardless of how many scones you’re making, as long as you don’t overcrowd the basket.
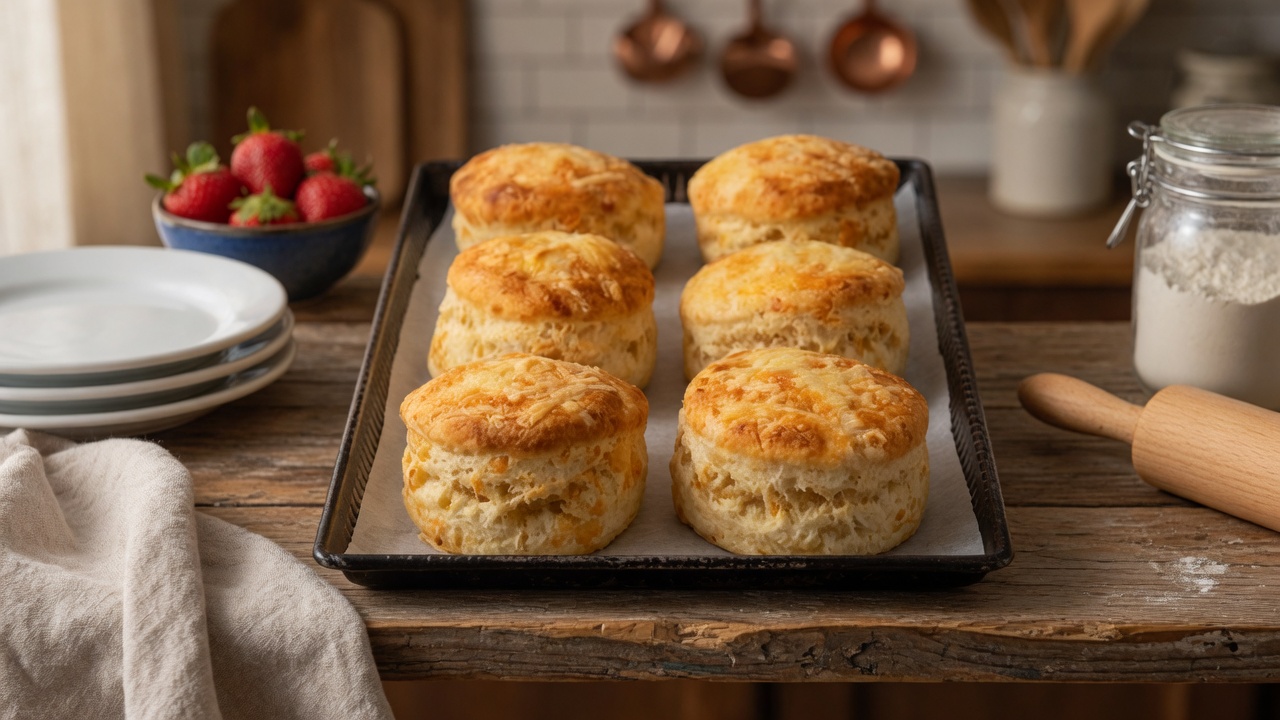
Air Fryer Cheese Scones Recipe
Quick and easy savory scones with cheddar cheese, crispy golden exterior, and fluffy interior, ready in just 9 minutes using an air fryer.
6
servings3
minutes6
minutes285
kcal9
minutesIngredients
2 cups all-purpose flour
2 teaspoons baking powder
Pinch of salt
½ teaspoon garlic powder, paprika, dried Italian herbs, or favorite seasoning
2 cups shredded cheddar cheese
½ cup milk (add gradually)
2 tablespoons finely chopped fresh chives (optional)
2 tablespoons cooked bacon crumbles (optional)
Light cooking oil spray
Directions
- Preheat air fryer: Set air fryer to 375°F (190°C) and let it preheat for a few minutes while you prepare the dough.
- Mix dry ingredients: Combine flour, baking powder, salt, and chosen seasoning in a large bowl. Stir until evenly distributed throughout the mixture.
- Add cheese: Stir shredded cheddar cheese into the flour mixture, coating each piece with flour. Add chives or bacon if using.
- Form dough: Slowly pour milk into the bowl while gently stirring. Add just enough milk to create a soft, slightly sticky dough that holds together. Avoid overmixing.
- Shape scones: Lightly dust your counter with flour and transfer dough to the surface. Knead gently for 10-15 seconds, then flatten to ¾ inch thick. Cut into rounds using a biscuit cutter or glass, or divide into 6 equal portions and shape by hand.
- Cook: Spray air fryer basket with oil. Arrange scones in a single layer with space between them. Spray tops lightly with oil. Cook for 3 minutes, flip each scone, then cook another 3 minutes until golden brown. Serve warm.
Notes
- Store cooled scones in airtight container at room temperature for 2 days or refrigerate for 5 days
- Freeze individually wrapped scones for up to 2 months and reheat directly from frozen
Nutrition Facts
- Calories: 285kcal
- Fat: 11g
- Carbohydrates: 32g
- Fiber: 1g
- Protein: 12g


