Freshly baked bread is one of life’s simplest pleasures. The aroma that fills the kitchen, the golden crust, and the soft, fluffy interior make homemade bread a favorite for many families. While traditional bread baking often requires a large oven and significant preparation time, modern air fryers have transformed the process, making it faster, easier, and more convenient than ever before.
If you’ve never considered baking bread in an air fryer, you may be surprised by how effective it is. The rapid circulation of hot air creates an ideal baking environment, producing bread with a beautifully browned exterior and a tender, airy crumb. Whether you’re new to baking or already have experience making homemade loaves, air fryer bread is a practical and rewarding recipe worth adding to your collection.
This comprehensive guide covers everything you need to know about making homemade air fryer bread, including ingredients, preparation methods, expert tips, troubleshooting advice, and a simple recipe that consistently delivers excellent results.
Why Bake Bread in an Air Fryer?
Air fryers have gained popularity for their ability to cook food quickly while maintaining excellent texture and flavor. Although many people associate air fryers with crispy fries and snacks, they are also highly effective baking appliances.
Faster Cooking Times
One of the biggest advantages of using an air fryer is speed. Unlike conventional ovens that require preheating and longer baking times, an air fryer reaches cooking temperature rapidly and bakes bread in significantly less time.
A loaf that might require 25 to 35 minutes in a traditional oven can often be fully baked in as little as 10 to 15 minutes in an air fryer.
Energy Efficiency
Air fryers consume less energy than full-sized ovens because they heat a much smaller space. This makes them an economical choice, especially when baking small batches of bread.
Consistent Results
The circulating hot air distributes heat evenly around the dough. This helps create a uniform crust and prevents uneven baking, which can sometimes occur in conventional ovens.
Ideal for Small Households
For individuals, couples, or small families, baking a compact loaf in an air fryer eliminates waste while still providing fresh homemade bread whenever desired.
Understanding the Science Behind Air Fryer Bread
The success of air fryer bread comes from the appliance’s powerful convection system. Hot air continuously moves around the dough, creating an environment similar to professional convection ovens.
This airflow helps:
- Develop a crisp exterior
- Promote even browning
- Retain internal moisture
- Create a light and fluffy crumb
- Reduce cooking time
The result is bread that tastes freshly baked while requiring less effort than traditional methods.
Essential Ingredients
One of the best aspects of this recipe is its simplicity. Most ingredients are already available in a typical kitchen pantry.
Active Dry Yeast
Yeast is responsible for helping the dough rise. During fermentation, yeast produces carbon dioxide gas, creating air pockets that make bread soft and fluffy.
Warm Water
Warm water activates the yeast and begins the fermentation process. The ideal temperature range is between 100°F and 110°F (38°C to 43°C).
Water that is too hot can kill the yeast, while water that is too cold may prevent proper activation.
All-Purpose Flour
All-purpose flour provides the structure needed for bread. It contains enough protein to develop gluten, which gives bread its characteristic texture.
Sugar
Sugar serves multiple purposes:
- Feeds the yeast
- Encourages rising
- Adds subtle sweetness
- Enhances browning
Salt
Salt strengthens the dough structure and balances the flavor. It also helps regulate yeast activity.
Milk
Milk enriches the dough, producing a softer texture and more tender crumb.
Butter
Butter contributes richness, flavor, and moisture while improving the bread’s overall texture.
Egg Wash
An egg wash creates an attractive golden-brown finish and adds shine to the crust.
Step-by-Step Guide to Making Air Fryer Bread
Step 1: Activate the Yeast
Begin by pouring warm water into a small bowl.
Add the yeast and stir gently. Allow the mixture to sit for approximately five minutes.
When ready, the surface should appear frothy and bubbly. This indicates the yeast is alive and active.
Step 2: Combine the Ingredients
In a large mixing bowl, combine:
- Flour
- Sugar
- Salt
Add:
- Activated yeast mixture
- Milk
- Softened butter
Mix until a rough dough forms.
Do not worry if the dough initially appears shaggy or uneven. This is completely normal.
Step 3: Knead the Dough
Transfer the dough onto a lightly floured work surface.
Knead for approximately 5 to 7 minutes.
During kneading, the dough will gradually become:
- Smooth
- Elastic
- Soft
- Easy to handle
Proper kneading develops gluten, which helps the bread rise and maintain structure.
Step 4: Shape the Dough
Form the dough into a smooth round ball.
A well-shaped dough ball encourages even rising and uniform baking.
Step 5: Allow the Dough to Rise
Place the dough into the air fryer basket or another suitable container.
Cover it with:
- A clean kitchen towel
- Plastic wrap
- A bowl turned upside down
Allow the dough to rise for approximately 30 minutes or until doubled in size.
This stage is crucial for producing light, fluffy bread.
Step 6: Apply the Egg Wash
Whisk one egg until smooth.
Using a pastry brush, gently coat the top of the dough with the egg mixture.
This simple step significantly improves appearance and crust color.
Step 7: Bake in the Air Fryer
Set your air fryer to 320°F (160°C).
Bake the loaf for approximately 8 to 10 minutes.
Check periodically during cooking.
The bread is ready when:
- The top is golden brown
- The crust feels firm
- The loaf sounds hollow when tapped
Depending on your air fryer model, you may need an additional 1 to 3 minutes.
Step 8: Cool Before Slicing
Remove the bread carefully and place it on a cooling rack.
Allow it to cool for several minutes before cutting.
Cooling helps the interior structure stabilize and prevents the bread from becoming gummy.
Simple Homemade Air Fryer Bread Recipe
Ingredients
- 2¼ teaspoons active dry yeast
- ¼ cup warm water
- 2 cups all-purpose flour
- 2 tablespoons granulated sugar
- ½ teaspoon salt
- ½ cup milk
- 2 tablespoons softened unsalted butter
Egg Wash
- 1 large egg, beaten
Directions
- Dissolve yeast in warm water and let stand until foamy.
- Mix flour, sugar, and salt in a bowl.
- Add yeast mixture, milk, and butter.
- Stir until a dough forms.
- Knead for 5 to 7 minutes until smooth.
- Shape into a ball.
- Let rise for 30 minutes until doubled.
- Brush with beaten egg.
- Air fry at 320°F (160°C) for 8 to 10 minutes.
- Cool slightly before slicing and serving.
Tips for Perfect Air Fryer Bread
Measure Ingredients Accurately
Too much flour can make bread dense and dry.
Using measuring cups correctly or weighing ingredients provides more consistent results.
Avoid Overheating the Water
Yeast is sensitive to temperature.
Always use warm—not hot—water.
Monitor Cooking Time
Air fryer models vary considerably.
Begin checking the bread after eight minutes.
Do Not Overcrowd the Basket
The dough needs space for proper airflow.
A cramped basket may result in uneven baking.
Allow Proper Rising Time
Even though air fryer baking is fast, rising remains essential.
Skipping this step can lead to dense bread.
Delicious Variations
Once you master the basic recipe, try experimenting with different flavors.
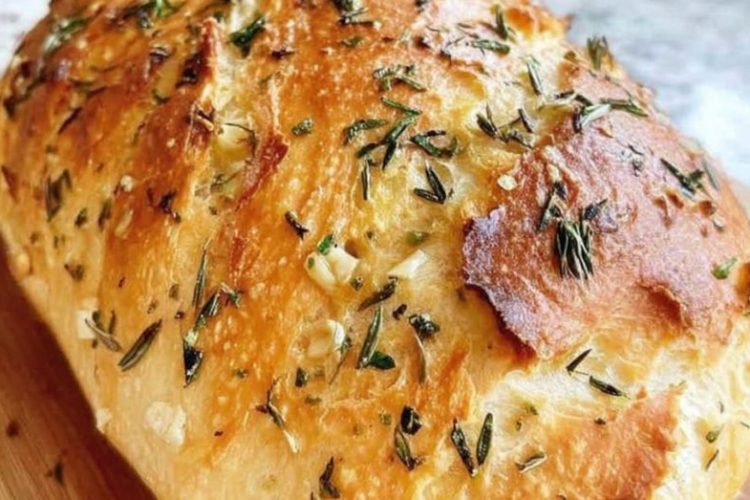
Garlic Herb Bread
Add:
- Garlic powder
- Dried oregano
- Parsley
- Basil
Cheese Bread
Mix shredded cheddar, mozzarella, or parmesan into the dough.
Cinnamon Raisin Bread
Incorporate:
- Cinnamon
- Raisins
- Brown sugar
Whole Wheat Bread
Replace half of the all-purpose flour with whole wheat flour for added nutrition.
Common Mistakes to Avoid
Bread Didn’t Rise
Possible causes include:
- Expired yeast
- Water that was too hot
- Insufficient rising time
Bread Is Too Dense
Often caused by:
- Excess flour
- Inadequate kneading
- Poor yeast activation
Crust Is Too Dark
Reduce cooking time slightly or lower the temperature by 10 to 15 degrees.
Bread Is Undercooked
Add an additional 1 to 3 minutes of cooking time and check again.
Storing Homemade Bread
To keep your bread fresh:
Room Temperature
Store in an airtight container for up to three days.
Refrigeration
Can extend freshness for several additional days, although the texture may become firmer.
Freezing
Wrap tightly and freeze for up to three months.
Thaw at room temperature before serving.
Final Thoughts
Making homemade bread no longer requires extensive baking experience or a large oven. With the help of an air fryer, anyone can create a delicious loaf featuring a crisp golden crust and a soft, fluffy interior in a fraction of the usual time.
This straightforward recipe is perfect for busy households, beginner bakers, and anyone who enjoys the taste of freshly baked bread. With just a handful of ingredients and a simple process, you’ll be able to enjoy warm homemade bread whenever the craving strikes.
Once you’ve mastered the basic loaf, feel free to experiment with herbs, cheeses, spices, and other flavor additions to create your own signature air fryer bread. The possibilities are endless, and every loaf offers another opportunity to enjoy the satisfaction of baking from scratch.
