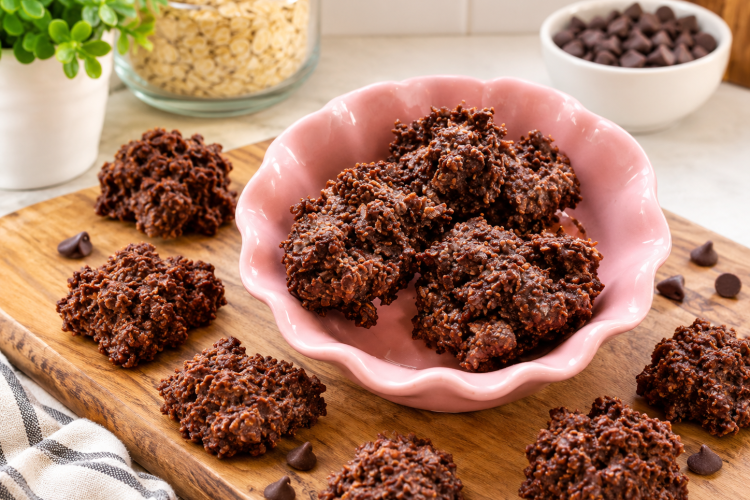
No-Bake Keto Chocolate Coconut Bites are a simple way to enjoy a chocolate treat while keeping your carbohydrates low. Made with just four ingredients, these little bites combine melted sugar-free chocolate, unsweetened shredded coconut, vanilla, and a pinch of salt. There is no complicated preparation, no oven required, and very little cleanup. With only five minutes of preparation and a short chilling time, they are a convenient homemade dessert for busy days.
These keto chocolate coconut bites are especially useful when you want something sweet without making an entire cake or batch of cookies. The chocolate creates a rich base, while the coconut adds a pleasant chewiness and a naturally nutty flavor. Vanilla rounds out the chocolate, and salt balances the sweetness. Once the mixture is combined and chilled, it becomes a collection of small, satisfying treats that are easy to portion and serve.
These Keto Chocolate Coconut Bites
Only Four Simple Ingredients
One of the biggest advantages of this recipe is its short ingredient list. You only need keto semi-sweet chocolate chips, unsweetened shredded coconut, vanilla, and salt. Each ingredient has a clear purpose, and there is no need for specialty baking equipment, complicated substitutions, or a long list of pantry items. Keeping the recipe simple also makes it easier to prepare whenever you want a quick homemade low-carb dessert.
No Baking or Complicated Preparation
These chocolate coconut bites are prepared without an oven, making them a practical choice during warm weather or when you do not want to spend time baking. The chocolate melts in the microwave, and the remaining ingredients are stirred directly into the bowl. After shaping the mixture into small portions, you simply place the tray in the freezer until the bites become firm enough to serve.
A Convenient Low-Carb Sweet Treat
For people following a ketogenic eating plan, having an easy dessert available can make meal planning more flexible. These bites are made with keto-friendly chocolate chips and unsweetened coconut, rather than conventional sweetened chocolate and coconut. The provided nutrition information lists approximately 0.9 grams of net carbohydrates per serving, although the actual amount depends on the brands and quantities used.
What Makes These Chocolate Coconut Bites Keto-Friendly?
Choosing Keto Semi-Sweet Chocolate Chips
The chocolate is the main ingredient responsible for the rich flavor and sweetness of these bites. Keto semi-sweet chocolate chips are designed for lower-carbohydrate recipes and are often sweetened with alternatives to regular sugar. In the original version of this recipe, semi-sweet chips provide enough sweetness to complement the unsweetened coconut without making the finished dessert overly sugary.
You can also use keto dark chocolate chips if you prefer a deeper cocoa flavor. Dark chocolate generally has a more intense taste, which works particularly well with coconut. However, different products have different sweeteners, carbohydrate counts, and melting properties. Check the package before purchasing, especially if you are tracking net carbohydrates or avoiding a particular sweetener.
Why Unsweetened Shredded Coconut Matters
Unsweetened shredded coconut gives these bites their distinctive texture and coconut flavor without adding the sugar found in many sweetened coconut products. It also helps create a chewy center that contrasts with the smooth chocolate coating. Because coconut is naturally rich in fiber and fat, it contributes to the satisfying texture of this small dessert.
Check the nutrition label when choosing your coconut. Carbohydrate and fiber amounts can vary between brands and product styles. Shredded coconut is the preferred choice for this recipe because its smaller pieces distribute more evenly throughout the melted chocolate. You can use unsweetened coconut flakes instead, but the larger pieces will change the texture and may make the bites more difficult to shape evenly.
Ingredients for No-Bake Keto Chocolate Coconut Bites
Four Ingredients You Need
Keto semi-sweet chocolate chips: One cup of keto semi-sweet chocolate chips forms the chocolate base. Choose a product that fits your preferred carbohydrate target and melts smoothly. Semi-sweet chocolate gives these bites a balanced flavor, while keto dark chocolate is an option if you enjoy a less sweet dessert.
Unsweetened shredded coconut: One cup of unsweetened shredded coconut provides the characteristic coconut taste and a slightly chewy texture. Make sure the package specifically says unsweetened, since sweetened coconut contains additional sugar and can change the nutritional profile of the recipe.
Vanilla: One teaspoon of vanilla adds a warm aroma and rounds out the chocolate and coconut flavors. It is a small addition, but it helps make the finished bites taste more like a complete dessert rather than simply melted chocolate mixed with coconut.
Salt: One-quarter teaspoon of salt balances the sweetness and brings out the chocolate flavor. Stir it in thoroughly so that it is distributed throughout the mixture instead of collecting in a few individual bites.
Essential Equipment for This Recipe
Simple Kitchen Tools
You do not need a food processor, electric mixer, or special candy-making equipment. A medium microwave-safe mixing bowl is sufficient for melting and combining the ingredients. A baking pan or flat baking sheet lined with parchment paper provides a convenient surface for portioning and chilling the bites.
Measuring cups and measuring spoons help you keep the ingredient quantities consistent. You will also need a spoon for stirring and dropping the chocolate mixture onto the prepared tray. If you want your bites to have a more uniform appearance, use a small cookie scoop or two spoons to portion them evenly.
How to Make No-Bake Keto Chocolate Coconut Bites
Step 1: Prepare the Baking Sheet
Start by lining a medium baking pan or baking sheet with parchment paper. Make sure the paper covers the surface where you plan to place the chocolate coconut mixture. This prevents the bites from sticking as they chill and makes it easier to lift them from the tray once they are firm.
Choose a tray that fits comfortably inside your freezer. A flat surface is useful because the mixture can spread slightly before it sets. Preparing the tray before melting the chocolate also means you can portion the mixture immediately after combining the ingredients, while the chocolate is still soft and easy to work with.
Step 2: Melt the Chocolate Chips
Place one cup of keto semi-sweet chocolate chips in a medium microwave-safe bowl. Microwave the chocolate in 30-second intervals, stirring after each interval. Continue until the chips have melted completely and the mixture looks smooth. Depending on your microwave, this will take approximately one and a half to two minutes in total.
Avoid heating the chocolate continuously for too long. Chocolate can become scorched or develop a thick, grainy texture when overheated. Stirring between intervals helps distribute the heat and encourages the remaining solid pieces to melt. If a few small pieces remain, stir the mixture gently before returning it to the microwave for another short interval.
Step 3: Add the Coconut, Vanilla, and Salt
Once the chocolate is completely melted, add one cup of unsweetened shredded coconut, one teaspoon of vanilla, and one-quarter teaspoon of salt. Stir everything together until the coconut is evenly coated with chocolate and there are no obvious pockets of dry ingredients.
The mixture should be thick enough to hold its shape when dropped onto the parchment paper. Make sure you scrape around the sides and bottom of the bowl while mixing, since melted chocolate can collect there. Thorough mixing gives every portion a similar balance of chocolate, coconut, vanilla, and salt.
Step 4: Shape the Chocolate Coconut Bites
Use a spoon to drop small portions of the mixture onto the prepared baking sheet. Keep the portions relatively similar in size so that they chill at approximately the same rate and are easy to serve. You do not need to make perfectly round shapes; these homemade bites can have a natural, slightly uneven appearance.
Leave a little space between each portion so they do not touch as the chocolate settles. If the mixture becomes difficult to scoop, stir it briefly to redistribute the coconut. You can also use two spoons to release the mixture neatly onto the tray and create more consistent portions.
Step 5: Freeze Until Firm
Place the baking sheet in the freezer for approximately 20 minutes, or until the chocolate coconut bites are set. The cold temperature helps the melted chocolate firm up and holds the shredded coconut in place. Once chilled, the portions should be easy to lift from the parchment paper without losing their shape.
Avoid moving the bites around too much while they are setting. Giving them enough time to become firm helps prevent smudging and makes serving easier. If your freezer is particularly full or the bites are larger than usual, they may need a little extra chilling time.
Step 6: Serve or Refrigerate
Once the bites are set, they are ready to enjoy. For a softer texture and fuller flavor, remove them from the refrigerator and let them sit at room temperature for 15 to 20 minutes before serving. This short resting period allows the chocolate to soften slightly, making each bite more pleasant to eat.
If you are not serving them immediately, transfer the bites to a covered container and refrigerate them. Keep any leftovers chilled so the chocolate remains firm and the bites retain their shape. You can take out a few portions whenever you want a quick dessert or a small chocolate snack.
How to Get the Best Texture and Flavor
Melt Chocolate Slowly
The most important step is melting the chocolate without overheating it. Short microwave intervals provide more control than one long heating session. Stirring regularly helps the chocolate melt evenly and reduces the risk of burning. A smooth melted base is easier to combine with coconut and produces a more consistent texture after chilling.
Use the Right Coconut
Finely shredded unsweetened coconut is a useful choice because it mixes easily with melted chocolate and helps the bites hold together. Larger coconut flakes can still work, but they may create a looser mixture with more noticeable pieces. If you switch products, remember that the final texture and nutritional information may differ from the original recipe.
Allow Enough Chilling Time
The bites need time to become firm before you move or serve them. Freezing for about 20 minutes is the suggested starting point, but the exact time depends on the size of the portions and your freezer. If the centers still feel soft or the chocolate sticks to the parchment, return the tray to the freezer for a few more minutes.
When to Serve Keto Chocolate Coconut Bites
An Easy After-Dinner Dessert
These small chocolate treats make a convenient dessert after lunch or dinner. Their rich chocolate flavor and coconut texture offer a sweet finish without requiring a large serving. Because they are prepared ahead and stored in the refrigerator, you can serve them directly from your chilled dessert container whenever you need something simple for the table.
A Quick Treat for Busy Days
When you have limited time to prepare dessert, these no-bake bites are an easy option. You can make a batch in the morning or the evening and keep it chilled for later. Their small size also makes portioning straightforward, which can be helpful when you want a dessert that is already divided into individual servings.
A Small Addition to a Dessert Platter
These bites can be arranged on a dessert plate alongside fresh berries or other low-carb treats. Their dark chocolate color and coconut texture provide a little variety without needing an elaborate presentation. If you are serving guests, arrange them in small paper cups or on a chilled platter to make them easier to pick up.
Storing No-Bake Keto Chocolate Coconut Bites
Refrigerator Storage
Store the finished bites in a covered, airtight container in the refrigerator. Keeping them chilled helps the chocolate stay firm and reduces the chance of the portions sticking together or losing their shape. If you are stacking the bites, separate the layers with parchment paper to make it easier to remove individual portions.
For serving, take out only the amount you need and allow the bites to sit at room temperature for 15 to 20 minutes. This gives the chocolate a little time to soften. Avoid leaving the entire batch out for an extended period, especially in a warm kitchen, because the chocolate may become soft.
Freezer Storage
You can also keep the bites in the freezer if you want to prepare them in advance. Place them in a freezer-safe covered container, using parchment paper between layers if necessary. When you want to serve them, allow the portions to soften slightly before eating so the chocolate and coconut texture is more enjoyable.
Recipe Notes and Helpful Answers
Can I Use Dark Chocolate Instead of Semi-Sweet?
Yes. Keto dark chocolate chips can replace the semi-sweet chocolate chips if you prefer a stronger cocoa flavor and less sweetness. The finished bites may taste more bittersweet, depending on the product you select. Check the package nutrition information, since different chocolate brands can vary in total carbohydrates, fiber, and sweeteners.
Can I Use Coconut Flakes Instead of Shredded Coconut?
Yes, unsweetened coconut flakes can be used instead of shredded coconut. Keep in mind that larger flakes create a different texture and may not distribute as evenly throughout the melted chocolate. They can also make the bites slightly more difficult to shape. If you use flakes, mix thoroughly and make sure each portion contains a good balance of chocolate and coconut.
Why Are My Chocolate Coconut Bites Not Firm?
If your bites are still soft after chilling, they may need more time in the freezer. Portion size, the temperature of the melted chocolate, and the freezer’s performance can all affect how quickly the mixture sets. Check the bites after the recommended 20 minutes and continue chilling if needed until they are firm enough to lift from the parchment.
How Can I Keep the Carbohydrates Low?
Choose keto chocolate chips and unsweetened shredded coconut, and compare their nutrition labels before preparing the recipe. Sweetened coconut and regular chocolate chips may add more sugar and carbohydrates than intended. Also, remember that serving size matters: the nutrition information provided is based on eight servings, so larger portions will contain more carbohydrates and calories.
Are These Bites Suitable for Making Ahead?
Yes. These bites are convenient for preparing ahead because they need time to chill and can be stored in a covered container in the refrigerator. Making them in advance means you can serve them whenever you want without repeating the melting and mixing process. Keep them refrigerated until serving, especially if your kitchen is warm.
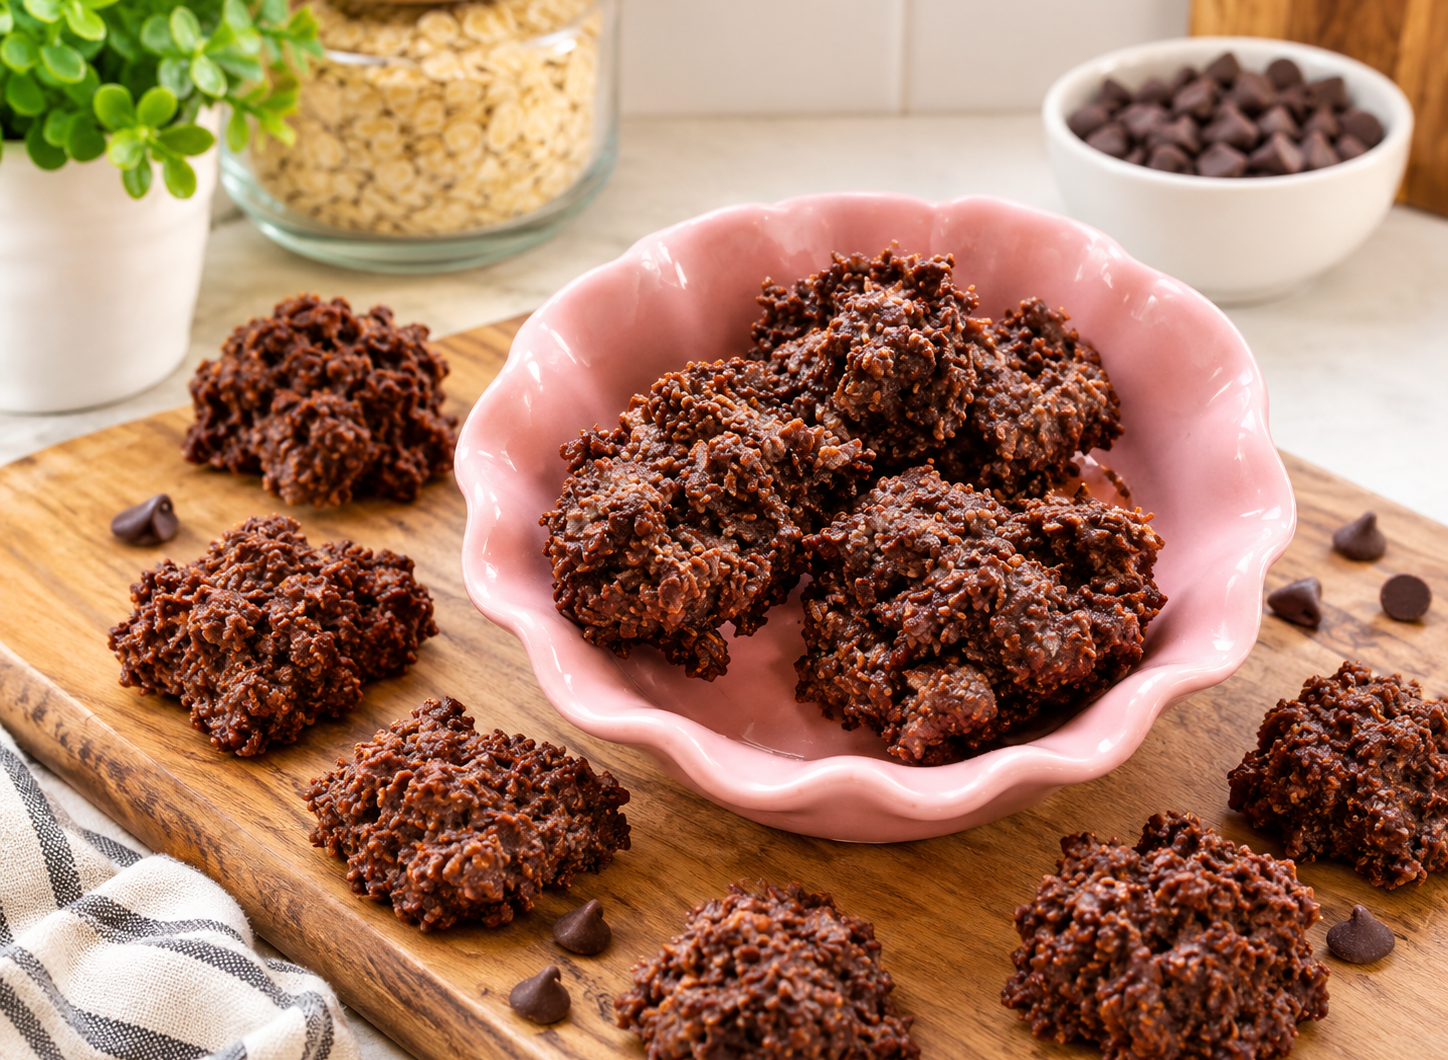
Keto Chocolate Coconut Bites
Rich chocolate, chewy coconut, and just four ingredients.
8
servings5
minutes143
kcal20
minutes25
minutesIngredients
1 cup keto semi-sweet chocolate chips
1 cup unsweetened shredded coconut
1 teaspoon vanilla
¼ teaspoon salt
Directions
- Line a medium baking pan or baking sheet with parchment paper.
- Place the keto semi-sweet chocolate chips in a medium microwave-safe bowl.
- Microwave in 30-second intervals, stirring after each interval, until completely melted and smooth (approximately 1½–2 minutes total).
- Add the shredded coconut, vanilla, and salt to the melted chocolate.
- Stir until all the ingredients are evenly combined.
- Drop the mixture by spoonfuls onto the prepared baking sheet.
- Freeze for 20 minutes or until the bites are firm and set.
- Serve immediately or store in a covered container in the refrigerator. For best results, let them sit at room temperature for 15–20 minutes before serving.
- Refrigerate any leftovers.
Nutrition Facts
- Calories: 143kcal
- Fat: 12g
- Carbohydrates: 2.8g
- Fiber: 1.9g
- Protein: 2g


