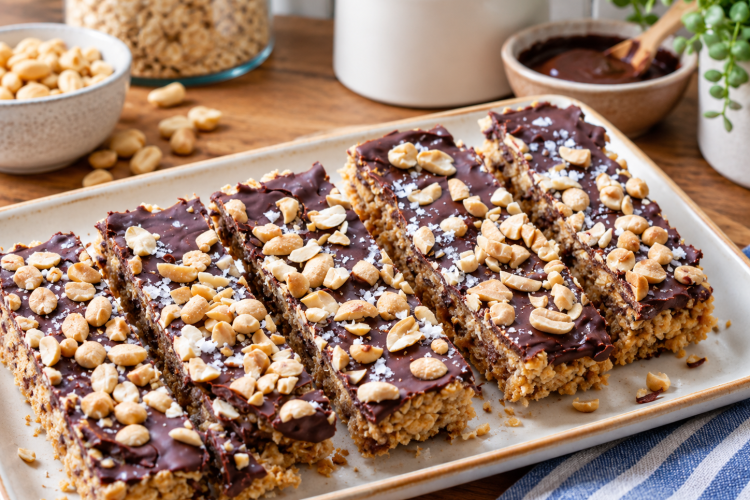
Peanut Butter Chocolate Crunch Bars are a delicious no-bake dessert made with crispy rice cakes, creamy peanut butter, honey, and a smooth chocolate topping. Finished with chopped peanuts and flaky sea salt, these homemade bars combine sweet, salty, crunchy, and creamy textures in every bite. They are easy to prepare with simple pantry ingredients and make a convenient dessert or afternoon snack when you want something chocolatey without turning on the oven.
These homemade peanut butter chocolate bars are inspired by the familiar combination of chocolate and peanut butter found in peanut butter cups. However, crushed rice cakes give them an extra-crunchy texture that makes every bite different. The peanut butter and honey hold the base together, while melted chocolate creates a rich topping that becomes firm after chilling. With only a few simple preparation steps, this recipe is suitable for beginners and anyone looking for an easy homemade sweet treat.
These Peanut Butter Chocolate Bars
No Baking Required
One of the biggest advantages of this recipe is that it does not require baking. You simply crush the rice cakes, combine them with peanut butter and honey, and press the mixture into a lined loaf pan. After adding the melted chocolate topping, the freezer helps everything become firm. This makes the recipe particularly useful during warm weather or on busy days when you want a homemade dessert without spending time baking.
Made with Simple Pantry Ingredients
These crunchy peanut butter bars use familiar ingredients that are easy to keep in your kitchen. Rice cakes provide the crispy base, peanut butter adds richness, and honey brings sweetness while helping the mixture stick together. Chocolate chips and coconut oil create the topping, while chopped peanuts and flaky sea salt finish the bars. Because the ingredient list is short, preparing everything is straightforward and does not require complicated shopping.
A Perfect Sweet and Salty Combination
Chocolate and peanut butter are popular together because their flavors balance each other naturally. The peanut butter provides a roasted, nutty taste, while chocolate adds sweetness and richness. Honey brings a gentle sweetness to the crunchy base, and flaky sea salt adds contrast to the finished dessert. Chopped peanuts reinforce the nutty flavor and make the texture more interesting, giving these bars a satisfying combination of flavors without requiring elaborate ingredients.
How to Make Peanut Butter Chocolate Crunch Bars
Step 1: Prepare the Loaf Pan
Line a 9×5-inch loaf pan with parchment paper, making sure the paper covers the bottom and extends up the sides. Leaving some extra parchment above the edges creates handles that make removing the chilled bars easier. Preparing the pan first is helpful because the peanut butter mixture is easiest to shape immediately after mixing, before it has a chance to become difficult to spread.
Step 2: Crush the Rice Cakes
Place the three rice cakes in a sturdy plastic bag and crush them with a rolling pin. Continue until they break into small pieces that can easily mix with the peanut butter. Avoid crushing them completely into powder because the larger crispy pieces create the signature crunch. Transfer the crushed rice cakes into a mixing bowl and check that there are no especially large pieces that could make the base uneven.
Step 3: Mix the Peanut Butter and Honey
Add the peanut butter and honey to the crushed rice cakes. Stir thoroughly until the rice cake pieces are coated and the mixture becomes sticky. The peanut butter provides the main binding texture, while honey adds sweetness and helps the ingredients hold together. Scrape the sides and bottom of the bowl as you mix so that the peanut butter is evenly distributed throughout the crushed rice cakes.
Step 4: Press the Base into the Pan
Transfer the mixture into the parchment-lined loaf pan. Use the back of a spoon to spread it evenly across the bottom, pressing firmly into the corners and along the edges. A tightly packed base is important because it helps the bars hold their shape after chilling. Smooth the surface before adding the chocolate so that the topping can cover the entire base in an even layer.
Step 5: Melt the Chocolate and Coconut Oil
Place the chocolate chips and coconut oil in a microwave-safe bowl. Heat them in 30-second intervals, stirring between each interval until the chocolate is completely melted and smooth. Stirring regularly helps distribute the heat and reduces the chance of overheating. Once the mixture has a glossy consistency without visible lumps, it is ready to pour over the peanut butter base.
Step 6: Add the Chocolate Topping
Pour the melted chocolate over the pressed peanut butter mixture. Spread it gently with the back of a spoon or a spatula until the entire surface is covered. Try to create an even layer that reaches the edges of the loaf pan. The chocolate provides the rich finishing layer and helps make the bars resemble crunchy peanut butter cups once they are sliced and served.
Step 7: Add Peanuts and Sea Salt
Sprinkle the chopped peanuts evenly over the melted chocolate. Add a little flaky sea salt across the surface while the chocolate is still soft. The peanuts create extra crunch, while the salt balances the sweetness of the honey and chocolate. Distributing the toppings evenly helps ensure that each finished bar has a similar combination of chocolate, peanuts, and salt.
Step 8: Freeze and Slice
Place the loaf pan in the freezer for approximately one hour, or until the base and chocolate topping are firm. Once set, lift the parchment paper to remove the entire slab from the pan. Place it on a cutting board and slice it into eight bars using a sharp knife. If the chocolate is very hard, let the slab rest briefly before cutting to make slicing easier.
Tips for Making Perfect Crunch Bars
Keep the Rice Cakes Slightly Chunky
The texture of the rice cakes makes these bars different from traditional peanut butter fudge. Crushing them into small pieces while leaving some slightly larger bits creates a more noticeable crunch. If the rice cakes are reduced entirely to powder, the base may become denser and lose some of its crisp texture. Aim for small, irregular pieces that can be evenly coated with the peanut butter and honey.
Press the Mixture Firmly
Pressing the base tightly into the loaf pan helps the bars stay together when sliced. Pay attention to the corners and edges because loose areas can crumble more easily. Use the back of a spoon to compact the mixture and create an even surface. Taking a little extra time during this step can make a difference when removing and cutting the chilled dessert.
Avoid Overheating the Chocolate
Chocolate can become thick or grainy if it is overheated. Use short microwave intervals and stir between each one rather than heating it continuously. Even when some chocolate chips still appear solid, stirring can help them melt using the warmth of the surrounding chocolate. The small amount of coconut oil also helps create a smoother consistency that spreads easily over the base.
How to Store Peanut Butter Chocolate Crunch Bars
Store in the Freezer
Keep leftover bars in an airtight container in the freezer for up to two weeks. If you need to stack them, place parchment paper between the layers to reduce sticking and protect the chocolate topping. An airtight container also helps prevent the bars from absorbing unwanted freezer odors and protects their texture during storage.
Serve Straight from the Freezer
These bars can be enjoyed directly from the freezer if you prefer a firm, crunchy texture. For a slightly softer bite, allow an individual bar to sit at room temperature briefly before serving. Avoid leaving the entire batch out for an extended period because the chocolate topping and peanut butter base will gradually soften. Taking out only the portions you need makes serving more convenient.
Frequently Asked Questions
Are Peanut Butter Chocolate Crunch Bars No-Bake?
Yes. This recipe does not require an oven. The rice cake mixture is pressed into a loaf pan, covered with melted chocolate, and chilled in the freezer until firm. It is a convenient choice when you want a homemade dessert without traditional baking.
How Long Does This Recipe Take?
The recipe lists 15 minutes of preparation, 40 minutes of cooking time, and 55 minutes in total. The instructions also call for one hour of freezing, which is needed to set the bars. Allow for that additional chilling time when planning to serve them.
Why Are My Bars Crumbling?
The base may crumble if the crushed rice cakes are not coated thoroughly or the mixture is not pressed firmly enough into the pan. Make sure the peanut butter and honey are evenly mixed throughout the rice cakes. Chilling the bars completely before slicing also helps them hold together.
Can I Prepare These Bars Ahead of Time?
Yes. These bars are suitable for making ahead because they can be stored in the freezer for up to two weeks. Slice them into eight portions after chilling and place them in an airtight container. You can then take out individual bars whenever you want a quick snack or dessert.
What Makes These Bars Crunchy?
Crushed rice cakes provide the main crunch, while chopped peanuts add another layer of texture. Keeping the rice cakes in small pieces rather than crushing them into a fine powder helps preserve their crispness. The smooth chocolate topping creates a contrast with the crunchy base.
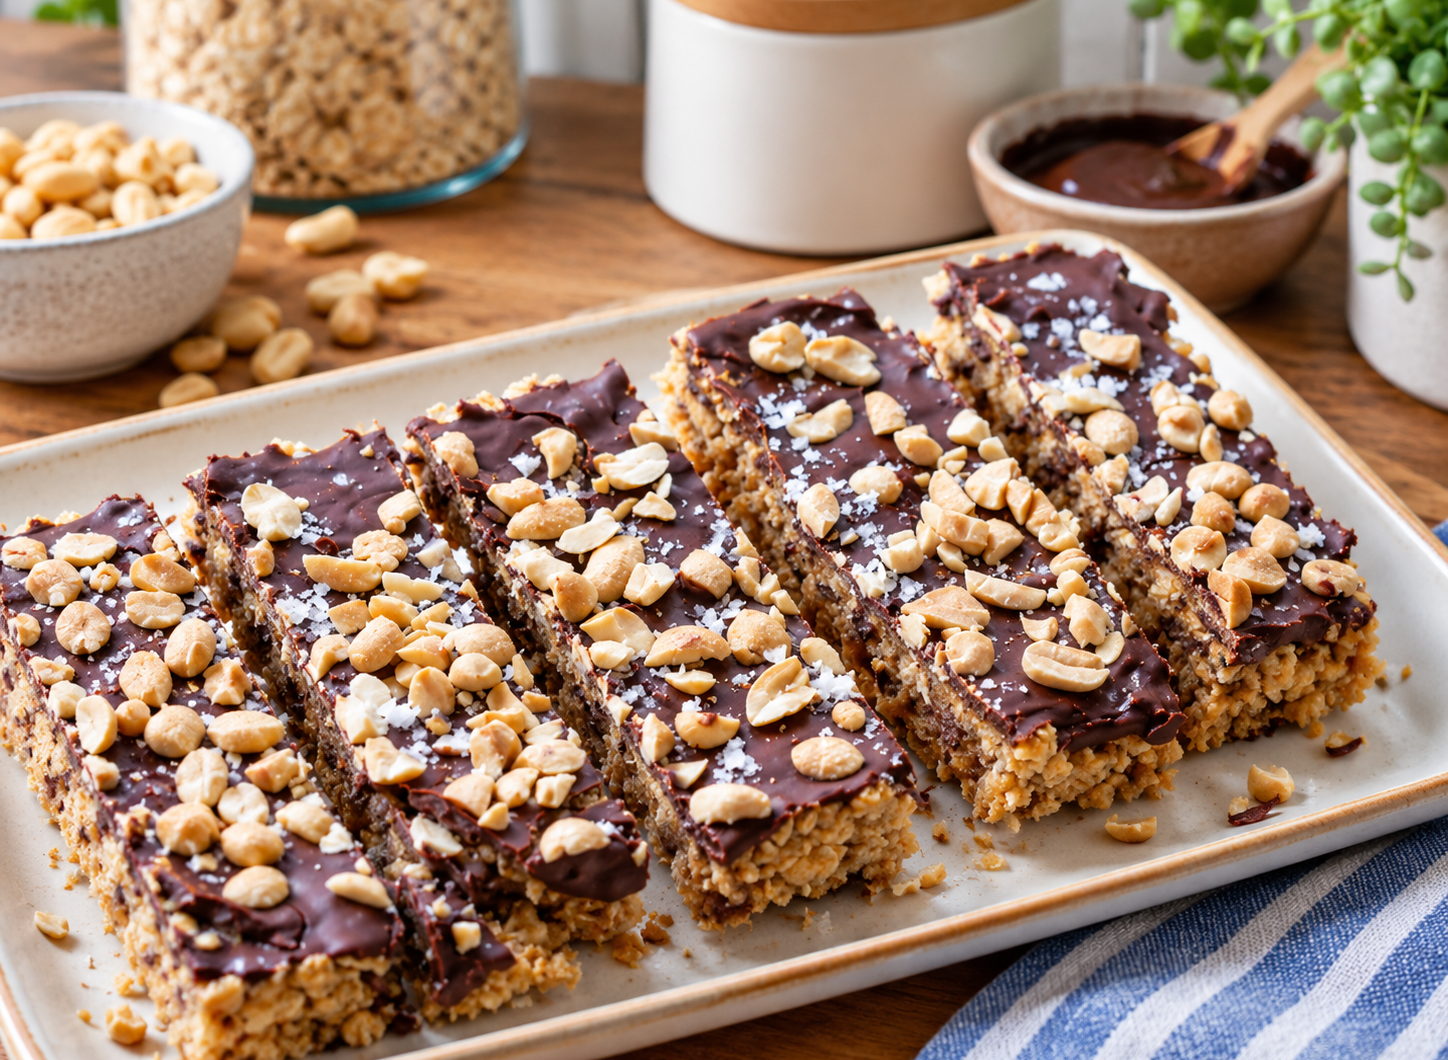
Chocolate Peanut Butter Crunch Bars Dessert
Easy no-bake bars with crushed rice cakes, creamy peanut butter, honey, and rich chocolate.
8
servings15
minutes40
minutes202
kcal55
minutesIngredients
3 rice cakes, crushed
1/2 cup peanut butter
1.5 tbsp honey
1/2 cup chocolate chips
1/2 tsp coconut oil
1/4 cup peanuts, chopped
Flaked sea salt for topping
Directions
- Line a 9×5-inch loaf pan with parchment paper and set aside.
- Place the rice cakes in a plastic bag and crush them into very small pieces. Transfer to a mixing bowl.
- Add the peanut butter and honey. Mix until all the rice cake pieces are coated and the mixture is sticky.
- Transfer the mixture to the lined loaf pan. Press it down firmly with the back of a spoon to form an even base.
- Microwave the chocolate chips and coconut oil in 30-second intervals, stirring between each interval until smooth.
- Pour the melted chocolate over the peanut butter base and spread it evenly to cover the top.
- Sprinkle with chopped peanuts and flaky sea salt. Freeze for 1 hour until firm.
- Remove from the freezer, cut into 8 bars, and enjoy. Store leftovers in an airtight container in the freezer for up to 2 weeks.
Nutrition Facts
- Calories: 202kcal
- Fat: 14g
- Carbohydrates: 17g
- Fiber: 2g
- Sugar: 5g
- Protein: 5g


