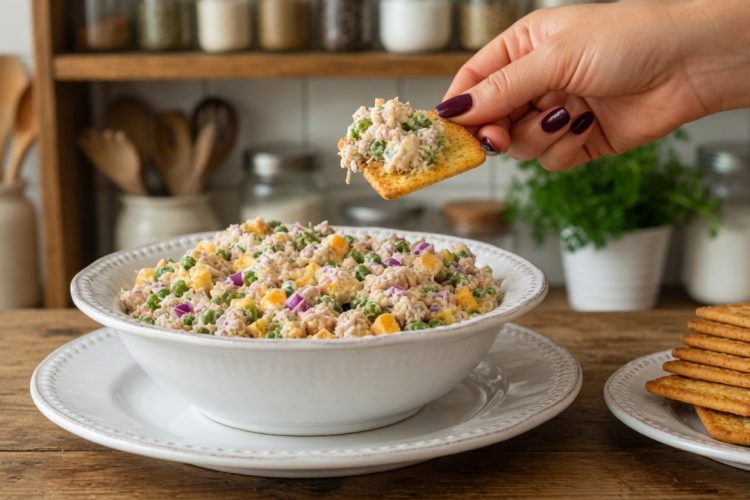
Making a good tuna salad at home doesn’t require fancy cooking skills or expensive ingredients. This particular tuna salad recipe gained popularity because it takes everyday items from your pantry and refrigerator and turns them into something truly enjoyable. Unlike plain versions that can taste bland or one-dimensional, this recipe layers different flavors and textures together. The mix includes protein-rich tuna, creamy mayonnaise, tangy pickles, sweet green peas, sharp cheese, and fresh vegetables. Each ingredient plays a specific role in creating a balanced dish that works for lunch, dinner, or even as a party appetizer.
Understanding What Makes This Recipe Special
Most basic tuna salad recipes follow a simple formula of canned tuna mixed with mayonnaise and perhaps some celery or onion. While that combination certainly works, it doesn’t offer much excitement. This version changes things by introducing ingredients you might not expect to find together. The sharp cheddar cheese brings a bold flavor that stands up well against the tuna. Green peas add natural sweetness and a pop of color. Dill pickles provide acidity that cuts through the richness. Italian dressing contributes herbs and extra tanginess. Hard-boiled eggs increase the protein content while making the salad more filling and substantial.
Best Types of Tuna to Use
Choosing the right canned tuna makes a real difference in your final results. Solid white albacore tuna tends to have a milder flavor and firmer texture, which some people prefer for salads. Chunk light tuna offers a stronger fish taste and softer consistency that breaks apart easily when mixed. Both varieties work perfectly fine in this recipe, so pick whichever you enjoy eating. Some cooks prefer tuna packed in water because it has fewer calories, while others like oil-packed tuna for its richer taste. Either option works as long as you drain it completely before adding it to your mixing bowl.
Getting Your Ingredients Ready
Good preparation saves time and helps everything come together smoothly. Start by opening all four cans of tuna and draining them thoroughly in a colander or strainer. Press down gently with a spoon to remove extra liquid. Next, dice your red onion into very small pieces so it distributes evenly throughout the salad rather than creating large chunks. Cut the sharp cheddar cheese into small cubes about the size of peas instead of shredding it. The cubes create little pockets of creamy cheese flavor in every bite. Chop your hard-boiled eggs into bite-sized pieces and make sure your green peas are completely thawed if using frozen ones.
How to Make the Perfect Dressing Base
The dressing brings all the ingredients together and provides moisture and flavor. In a medium bowl, whisk together the mayonnaise, Italian dressing, Dijon mustard, fresh lemon juice, garlic powder, and black pepper until the mixture looks smooth and creamy. This combination creates layers of taste that go beyond plain mayonnaise. The mustard adds sharpness and depth. Lemon juice brightens everything and prevents the salad from tasting too heavy. Italian dressing introduces herbs like oregano and basil along with a vinegar tang. Garlic powder provides savory undertones without the bite of raw garlic. Mix these thoroughly so the flavors blend together before adding to the tuna.
Putting Everything Together Properly
Once your dressing is ready and all ingredients are prepped, place the drained tuna in a large mixing bowl. Use a fork to break apart any large chunks, but don’t mash it into paste. You want to maintain some texture. Add the diced red onion, chopped dill pickles, thawed green peas, cubed sharp cheddar cheese, chopped hard-boiled eggs, and fresh parsley to the bowl. Pour your prepared dressing over everything. Using a large spoon or rubber spatula, gently fold all the ingredients together until evenly coated with dressing. Be careful not to stir too aggressively or you’ll break down the ingredients and lose the chunky texture that makes this salad interesting.
Why Chilling Time Matters
While you could eat this tuna salad immediately after mixing, allowing it to chill in the refrigerator for at least thirty minutes dramatically improves the taste. During this resting period, the dressing soaks into the tuna and other ingredients. The flavors marry together and become more harmonious rather than tasting like separate components. The cheese softens slightly, the onions mellow out, and everything reaches the same cool temperature. If you have the time, making this salad a few hours ahead or even the night before serving gives you even better results. The flavors continue developing the longer they sit together in the refrigerator.
Different Ways to Serve Your Tuna Salad
This versatile salad works in many different serving situations. For a simple lunch at home, pile it onto toasted bread with lettuce and tomato slices to make a classic tuna salad sandwich. Butter croissants and stuff them with the salad for a more elegant presentation. Scoop the mixture into halved avocados for a low-carb, nutrient-dense meal. Spread it inside flour tortillas along with shredded lettuce and rolled vegetables for portable wraps. Serve it alongside crackers as an appetizer or snack. Spoon it into crisp lettuce leaves like butter lettuce or romaine for light lettuce cups that work great for parties or gatherings.
Making This Recipe Your Own
Feel free to adjust this recipe based on what you like or what you have available. If you enjoy spicy food, add diced jalapeño peppers, a dash of hot sauce, or some crushed red pepper flakes to give the salad heat. For a Mediterranean twist, mix in chopped kalamata olives, crumbled feta cheese instead of cheddar, diced cucumber, and fresh dill. Want extra crunch? Add diced celery, chopped bell peppers in any color, or toasted sliced almonds. To make a lighter version, replace half the mayonnaise with plain Greek yogurt. The yogurt still provides creaminess but with less fat and more protein than mayonnaise alone.
Smart Shopping Tips for This Recipe
When shopping for ingredients, look for sales on canned tuna since you need four cans. Store brands often taste just as good as name brands but cost significantly less. Buy blocks of sharp cheddar cheese and cut them yourself rather than purchasing pre-cubed cheese, which usually costs more and may contain anti-caking agents. Fresh red onions work better than white or yellow onions because they have a milder, slightly sweet flavor that doesn’t overpower the other ingredients. Pick firm dill pickles rather than bread-and-butter pickles, which are too sweet for this savory salad. Fresh parsley adds brightness, but if you only have dried parsley, use about one tablespoon instead of two.
Common Problems and How to Fix Them
Some people end up with watery tuna salad because they didn’t drain the tuna well enough. After opening the cans, let the tuna sit in a strainer for a few minutes and press out the liquid. If your finished salad seems too dry, add a little more mayonnaise one tablespoon at a time. If it’s too wet, drain off any pooled liquid and add a bit more of the solid ingredients. Overmixing creates a mushy texture, so fold ingredients gently and stop as soon as everything is combined. If the salad tastes bland, you probably need more acid. Add another squeeze of lemon juice or a splash of pickle juice to brighten the flavors.
Storing Leftovers Safely
Keep any leftover tuna salad in an airtight container in your refrigerator. Glass containers with tight-fitting lids work especially well. The salad stays fresh and safe to eat for up to three days when properly refrigerated. Don’t leave it sitting out at room temperature for more than two hours, as mayonnaise-based salads can spoil quickly. If you notice any liquid separation in your container, simply stir the salad gently before serving. For best quality and food safety, don’t try to freeze this salad. The mayonnaise and other ingredients don’t freeze well and will separate and become watery when thawed, resulting in an unappetizing texture.
Meal Prep Ideas Using This Salad
This tuna salad works wonderfully for weekly meal preparation. Make a full batch on Sunday and divide it into individual portions in small containers. Pack it with crackers, vegetable sticks, or bread for ready-made lunches throughout the week. You can also prep all the ingredients separately and store them in different containers, then assemble individual servings as needed. This method keeps ingredients fresher longer and lets you control portion sizes. If you’re meal prepping for kids, consider using cookie cutters to cut sandwiches into fun shapes or serving the salad with their favorite crackers and vegetables.
Nutritional Benefits You Should Know
Tuna provides excellent lean protein, which helps build and repair muscles while keeping you feeling full longer. Each serving of this salad delivers a substantial amount of protein from both the tuna and hard-boiled eggs. Tuna also contains omega-3 fatty acids, which support heart and brain health. The green peas add fiber, vitamins, and minerals including vitamin K, vitamin C, and manganese. Hard-boiled eggs contribute additional protein plus important nutrients like vitamin D, vitamin B12, and choline. Even the cheese provides calcium and protein. While this salad does contain mayonnaise, you can reduce the amount or substitute part of it with Greek yogurt for a lighter option.
Pairing Ideas for Complete Meals
While tuna salad can certainly stand alone, pairing it with complementary sides creates a more satisfying meal. Serve it alongside a cup of tomato soup for a comforting lunch combination. Fresh fruit like apple slices, grapes, or melon provides natural sweetness that balances the savory salad. A simple green salad with vinaigrette adds freshness and more vegetables to your plate. Vegetable chips or baked potato chips offer crunch without being too heavy. For a heartier meal, serve the tuna salad with a bowl of minestrone soup or a warm pasta salad. Cold cucumber salad or coleslaw makes refreshing accompaniments during warmer months.
Questions People Often Ask
Can you make this recipe ahead of time? Yes, and many people find the flavor actually improves after sitting in the refrigerator for several hours or overnight. The ingredients have more time to blend together, creating a more cohesive taste. Just keep it covered and chilled until you’re ready to serve it to your family or guests.
What if you don’t like certain ingredients? This recipe is flexible enough to accommodate different preferences. Don’t like peas? Leave them out or substitute corn. Not a fan of pickles? Try using pickle relish instead, or skip them entirely and add extra lemon juice for tanginess. You can swap the cheddar cheese for another variety or omit it completely if needed.
How do you keep it from getting watery? The key is thoroughly draining your tuna and using the right amount of dressing. Start with the amount listed in the recipe, then add more only if needed. You can always add more mayonnaise, but you can’t take it away once mixed in.
Is this suitable for special diets? The basic recipe contains dairy and eggs, so it’s not suitable for vegans. However, you can make it dairy-free by omitting the cheese or using a dairy-free alternative. For people watching carbohydrates, this salad is naturally low in carbs and works well for keto diets when served with lettuce cups or low-carb crackers instead of bread.
Why Fresh Ingredients Make a Difference
Using fresh ingredients whenever possible improves both flavor and nutrition. Fresh lemon juice tastes brighter and more vibrant than bottled lemon juice. Real mayonnaise made with eggs and oil has better flavor and texture than imitation spreads. Fresh parsley adds a clean, herbal note that dried parsley can’t match. Fresh red onion provides a crisp texture and sharp bite. Hard-boiled eggs you cook yourself have better texture than pre-peeled eggs from a package. While convenience products certainly work in a pinch, investing a little extra time in fresh ingredients pays off in the final taste and quality of your tuna salad.
Kitchen Tools That Make This Easier
You don’t need any special equipment to make this recipe, but a few basic tools help the process go smoothly. A good can opener makes opening four tuna cans quick and easy. A fine-mesh strainer helps drain the tuna thoroughly. A medium mixing bowl works well for whisking together the dressing ingredients. A large mixing bowl gives you plenty of room to fold everything together without making a mess. A sharp knife makes chopping onions, pickles, and eggs much easier. A rubber spatula or large spoon helps fold ingredients gently without crushing them. An airtight storage container keeps leftovers fresh in the refrigerator.
How to Adjust Portions
This recipe makes six to eight servings, which is perfect for meal prep or feeding a family. If you’re cooking for just one or two people, you can easily cut the recipe in half. Use two cans of tuna instead of four and reduce all other ingredients by half. For a larger crowd or party, double the recipe using eight cans of tuna and twice the amount of everything else. Just make sure you have a mixing bowl large enough to hold everything comfortably. The recipe scales up or down equally well without any adjustments to technique or method.
Matthew McConaughey Tuna Salad
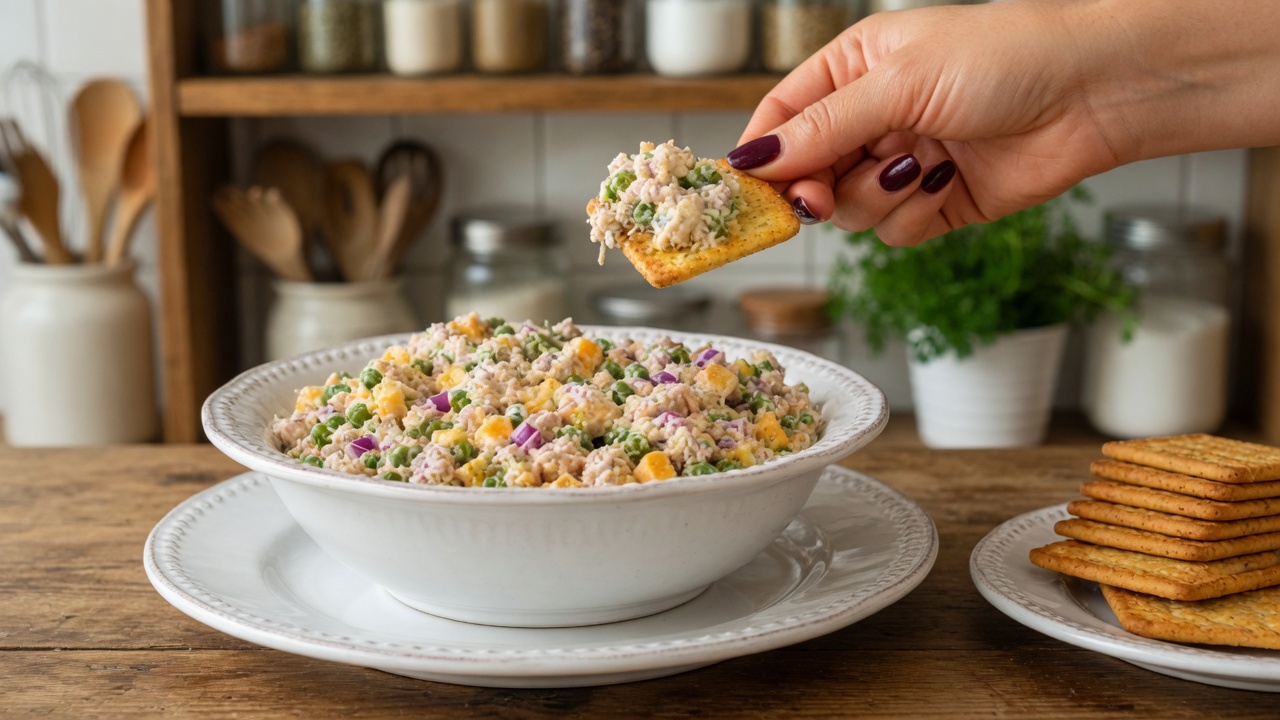
This elevated tuna salad combines protein-rich tuna with sharp cheddar cheese, sweet green peas, tangy pickles, and hard-boiled eggs in a flavorful dressing. Perfect for sandwiches, crackers, lettuce wraps, or enjoying straight from the bowl.
6-8
servings15
minutes40
minutes55
minutesIngredients
4 cans tuna (5 ounces each), drained thoroughly
¾ cup mayonnaise
2 tablespoons Italian dressing
1 tablespoon Dijon mustard
1 tablespoon fresh lemon juice
½ cup red onion, finely diced
½ cup dill pickles, chopped
¾ cup green peas, thawed
1 cup sharp cheddar cheese, cut into small cubes
2 hard-boiled eggs, chopped
½ teaspoon garlic powder
½ teaspoon black pepper
Salt to taste
2 tablespoons fresh parsley, chopped
Directions
- Make the dressing: In a medium bowl, whisk together mayonnaise, Italian dressing, Dijon mustard, lemon juice, garlic powder, and black pepper until smooth and well combined.
- Prepare the tuna: Place drained tuna in a large mixing bowl and gently break apart larger chunks with a fork while keeping some texture.
- Add remaining ingredients: Add diced red onion, chopped pickles, thawed peas, cubed cheddar cheese, chopped eggs, and fresh parsley to the bowl with tuna.
- Combine everything: Pour the prepared dressing over the ingredients and gently fold together using a spatula until everything is evenly coated. Avoid overmixing to maintain chunky texture.
- Chill and serve: Cover the bowl and refrigerate for at least 30 minutes before serving to allow flavors to blend together. Serve on crackers, bread, lettuce cups, or croissants.
Notes
- Always drain tuna completely to prevent watery salad
- Store in airtight container in refrigerator for up to 3 days
- Cut cheese into small cubes rather than shredding for better texture
- Taste before adding salt as many ingredients already contain sodium
- Make ahead for better flavor development
- Not recommended for freezing due to mayonnaise-based dressing
- Substitute half the mayonnaise with Greek yogurt for lighter version
- Add jalapeños or hot sauce for spicy variation


