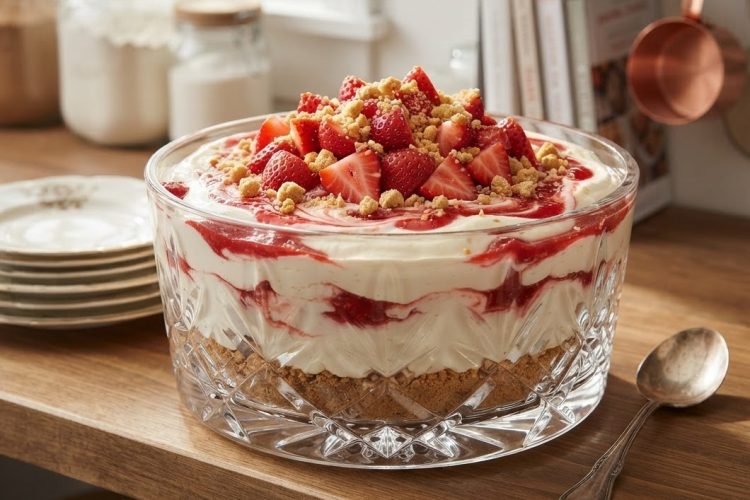
When you need a dessert that tastes amazing but doesn’t require turning on your oven, these no-bake strawberry cheesecake cups deliver exactly what you’re looking for. Each cup contains layers of crushed graham crackers mixed with butter, a smooth cream cheese filling, sweet strawberry jam, and fresh berries arranged in clear cups or jars. The presentation looks professional enough for special events, yet the preparation is simple enough that anyone can make them successfully. You don’t need fancy baking skills or expensive equipment to create these individual desserts that everyone will enjoy.
Why Individual Servings Work Better
Making cheesecake in small cups instead of one large pan offers several practical benefits that make your life easier. You don’t have to worry about cutting perfect slices or keeping the dessert stable while serving it to guests. Each person gets their own portion that’s already perfectly sized, which means no mess and no arguments about who got the bigger piece. These cups are also much easier to transport to parties, picnics, or potluck dinners because you can just stack them carefully in a container. The individual format also allows you to customize some cups with different toppings or flavors if you have guests with different preferences.
Getting Started with Simple Ingredients
This recipe uses basic ingredients that you can find at any grocery store without searching through specialty food sections. Graham crackers form the base, cream cheese and heavy cream create the filling, strawberry jam adds fruity sweetness, and fresh strawberries provide bright flavor and color. Most people already have butter, sugar, and vanilla extract sitting in their kitchen, which means you probably only need to pick up a few items. Using common ingredients also means you can make this dessert any time without planning days ahead or ordering special items online. The simplicity of the ingredient list doesn’t reduce the quality of the final result at all.
Creating the Perfect Crumb Base
The bottom layer of these cheesecake cups needs to be sturdy enough to support the creamy filling while still being easy to eat with a spoon. Crushing graham crackers into fine crumbs and mixing them thoroughly with melted butter creates a texture that holds together without becoming hard or difficult to scoop. You want the butter to coat every crumb evenly so the base stays together when you press it into the cups. Pressing too hard makes the layer too compact and tough, while not pressing enough means it will fall apart when someone tries to eat it. Finding the right balance takes just a few seconds of gentle pressure with the back of a spoon.
Preparing Cream Cheese the Right Way
The texture of your cheesecake filling depends heavily on starting with cream cheese that’s properly softened to room temperature. Cold cream cheese straight from the refrigerator will create lumps no matter how much you mix it, and those lumps ruin the smooth texture that makes cheesecake so enjoyable. Taking the cream cheese out of the fridge about an hour before you start preparing the recipe gives it enough time to soften naturally. If you forgot to do this, you can cut it into smaller pieces to help it soften faster, though patience works better than trying to microwave it. Properly softened cream cheese blends easily with sugar and vanilla to create a completely smooth base for your filling.
Whipping Cream for Maximum Fluffiness
The heavy cream you add to the cream cheese mixture serves an important purpose beyond just adding dairy flavor. Whipping the cream until it forms stiff peaks incorporates air that makes the filling light and fluffy instead of dense and heavy like traditional baked cheesecake. Using a chilled bowl and cold cream helps the fat molecules solidify faster, which creates more stable whipped cream that holds its shape better. You’ll know the cream is ready when you lift the beaters and the peaks stand straight up without drooping over. This whipped cream needs to be folded gently into the cream cheese mixture rather than stirred vigorously, which preserves all those air bubbles you just created.
Folding Ingredients Without Losing Air
When recipes tell you to fold ingredients together instead of mixing them, there’s a good reason for that specific instruction. Folding means using a spatula to gently lift the mixture from the bottom and turn it over the top in a slow, careful motion. This technique combines the whipped cream with the cream cheese without knocking out all the air you worked hard to incorporate. If you just stir everything together quickly, you’ll deflate the whipped cream and end up with a dense filling instead of a light, mousse-like texture. Taking an extra minute or two to fold properly makes a noticeable difference in how the finished dessert feels in your mouth.
Working with Fresh Strawberries
Choosing good strawberries makes this dessert taste much better because strawberries are one of the main flavors throughout the layers. Look for berries that are bright red all over without white or green patches near the stem, which indicates they were picked before fully ripening. Strawberries should smell sweet and fruity even before you cut into them. Washing them gently and patting them completely dry before cutting prevents excess water from making your dessert watery. Cutting the berries into small dice distributes the fresh fruit flavor more evenly throughout each cup instead of having large chunks that dominate some bites while other bites have none.
Adding Strawberry Jam for Extra Flavor
Fresh strawberries provide wonderful taste and texture, but strawberry jam adds concentrated sweetness and creates beautiful swirls of color throughout the cream cheese filling. The jam has a thicker consistency than fresh fruit, which means it doesn’t sink to the bottom or make the filling watery. When you dollop the jam onto the cheesecake layer and gently swirl it with a spoon or knife, you create ribbons of intense strawberry flavor that complement the milder fresh berries. Using good quality jam with actual fruit pieces instead of artificially flavored jelly makes a noticeable difference. You can also substitute other flavors like raspberry, blueberry, or blackberry jam if you want to change the fruit profile.
Layering Your Dessert Cups
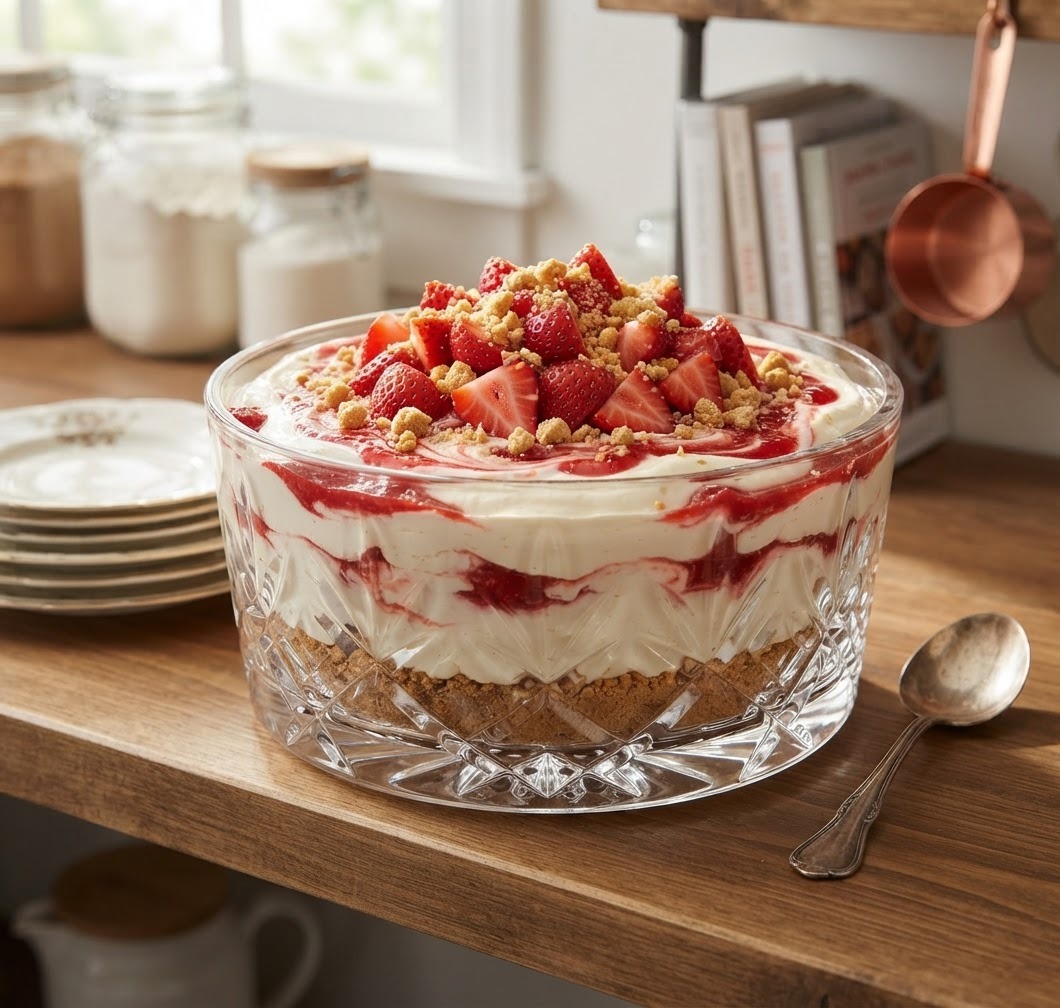
The order you add ingredients to each cup affects both how the dessert looks and how it tastes when you eat it. Starting with the graham cracker base gives you a solid foundation that soaks up some moisture from the filling above it, which creates a softer texture. Adding the cream cheese layer next provides the main body of the dessert and a neutral background for the fruit flavors. Swirling in jam and adding diced strawberries creates pockets of concentrated fruit throughout the creamy filling. If you’re using taller cups, you can repeat the layers to create more visual interest and ensure every spoonful has a bit of everything.
Allowing Enough Chilling Time
Even though this dessert doesn’t require baking, it absolutely needs time in the refrigerator before you can serve it. The filling starts out soft and needs several hours in the cold to firm up to the right consistency. Chilling also allows the graham cracker base to absorb some moisture from the filling, which softens it just enough to make it easy to eat with a spoon. The flavors also blend together better after sitting for a few hours, with the vanilla in the filling mellowing out and the strawberry flavor spreading throughout. While you can technically eat these cups after just two hours, waiting four to six hours or overnight produces much better results with proper texture and flavor.
Making Dessert Ahead of Time
One of the best features of this recipe is that you can prepare everything a day or two before you need to serve it. Making dessert ahead reduces stress on the day of your event and actually improves the final product since longer chilling time enhances both texture and flavor. You can assemble all the cups completely, cover them with plastic wrap or lids, and store them in the refrigerator until you’re ready to serve. If you want to keep them longer, you can freeze the assembled cups without the final fresh strawberry garnish for up to a month. Just move them from the freezer to the refrigerator the night before you plan to serve them so they can thaw slowly and maintain the right texture.
Customizing with Different Flavors
While strawberry cheesecake is delicious on its own, you can easily change the flavors to create different versions of this dessert. Swapping strawberries for blueberries, raspberries, or blackberries creates entirely new taste experiences while keeping the same basic preparation method. You could also mix several types of berries together for a mixed berry version with more complex flavor. Adding lemon zest to the cream cheese filling creates a brighter, tangier taste that works especially well in warm weather. Chocolate lovers can sprinkle mini chocolate chips between the layers or drizzle melted chocolate over the top. Each variation keeps the easy no-bake method while offering your guests something different.
Storing Leftovers Properly
If you happen to have any dessert cups remaining after your meal, storing them correctly keeps them fresh and tasty for several days. Each cup should be covered individually with plastic wrap or a lid to prevent the filling from absorbing refrigerator odors or drying out on top. Stored this way in the refrigerator, the cups stay good for up to three days, though the fresh strawberry garnish might lose some of its brightness after the first day. The graham cracker base becomes softer the longer the dessert sits, which some people actually prefer. If you want to maintain the crunchiest base possible, you can add that layer to each cup shortly before serving instead of preparing it days ahead.
Choosing the Right Serving Containers
The containers you use for assembling these desserts affect both presentation and practicality. Clear glass cups or jars show off all the beautiful layers and allow guests to see exactly what they’re getting before they take the first bite. Plastic cups work fine if you need something unbreakable for outdoor events or gatherings with children. Mason jars create a casual, homey look that works well for informal parties or rustic-themed events. Small wine glasses or dessert coupes create a more elegant presentation for formal dinners or celebrations. Whatever container you choose should hold at least half a cup of dessert and have an opening wide enough to fit a spoon comfortably.
Garnishing for Beautiful Presentation
The finishing touches you add right before serving can transform these simple desserts into something that looks professionally made. A dollop of freshly whipped cream on top adds height and elegant white color that contrasts nicely with the red strawberries. Placing a perfectly sliced strawberry on top gives each cup a clear indication of the flavor inside. A light sprinkle of graham cracker crumbs adds texture and reinforces the crust flavor throughout the dessert. Fresh mint leaves provide a pop of green color and a subtle herbal aroma that complements the sweet fruit. These small details take only a few seconds per cup but make a big difference in how impressive the desserts look when you set them on the table.
Serving Suggestions for Different Events
These no-bake cheesecake cups work well for many different types of gatherings and occasions throughout the year. They’re perfect for summer barbecues and picnics because they’re served cold and don’t require reheating. Birthday parties for both children and adults benefit from the individual serving format that makes distribution easy and fair. Holiday dinners appreciate a lighter dessert option after a heavy meal. Bridal showers and baby showers often feature these elegant little cups because they look beautiful and taste wonderful without requiring the hosts to spend all day in the kitchen. Even a regular family dinner becomes more special when you serve dessert in individual portions that show you put thought into the presentation.
Common Mistakes to Avoid
Several simple errors can prevent these desserts from turning out as well as they should, but knowing about them helps you avoid problems. Using cold cream cheese instead of softened creates a lumpy filling that never becomes completely smooth no matter how much you beat it. Over-mixing after you add the whipped cream deflates all the air and creates a dense, heavy texture instead of light and fluffy. Not chilling the dessert long enough means the filling stays too soft and doesn’t hold its shape when you try to eat it. Adding the fresh strawberry garnish too far ahead causes the berries to release juice and look wilted instead of fresh. Being aware of these potential issues helps you take the right steps to ensure perfect results every time you make this recipe.
Keto Strawberry Cheesecake
Individual layered desserts with graham cracker base, creamy cheesecake filling, strawberry jam swirls, and fresh berries that require no baking.
30
minutes40
minutes385
kcal1
hour10
minutesIngredients
- For the Biscuit Base:
1 cup graham cracker crumbs
3 tablespoons unsalted butter, melted
1 tablespoon granulated sugar (optional)
- For the Cheesecake Filling:
8 ounces (225g) cream cheese, softened
½ cup powdered sugar
1 teaspoon vanilla extract
1 cup heavy whipping cream, chilled (or 1½ cups prepared whipped topping)
- For the Strawberry Layer:
½ cup strawberry jam
1 cup fresh strawberries, diced
- For Garnish:
Extra fresh strawberries
Graham cracker crumbs
Whipped cream (optional)
Fresh mint leaves (optional)
Directions
- Mix graham cracker crumbs with melted butter and optional sugar until evenly combined. Spoon the mixture into individual dessert cups and press gently to create a firm base layer.
- Whip the chilled heavy cream in a cold bowl until stiff peaks form. In a separate bowl, beat softened cream cheese, powdered sugar, and vanilla extract until completely smooth. Gently fold the whipped cream into the cream cheese mixture until fully combined.
- Spoon a layer of cheesecake filling over each graham cracker base. Add a spoonful of strawberry jam and gently swirl it into the filling using a spoon. Sprinkle diced fresh strawberries over the top.
- Cover the dessert cups and refrigerate for at least 2 hours, preferably 4-6 hours or overnight, until the filling is firm.
- Garnish and serve: Before serving, top each cup with fresh strawberries, extra graham cracker crumbs, whipped cream, and mint leaves if desired. Serve cold.


