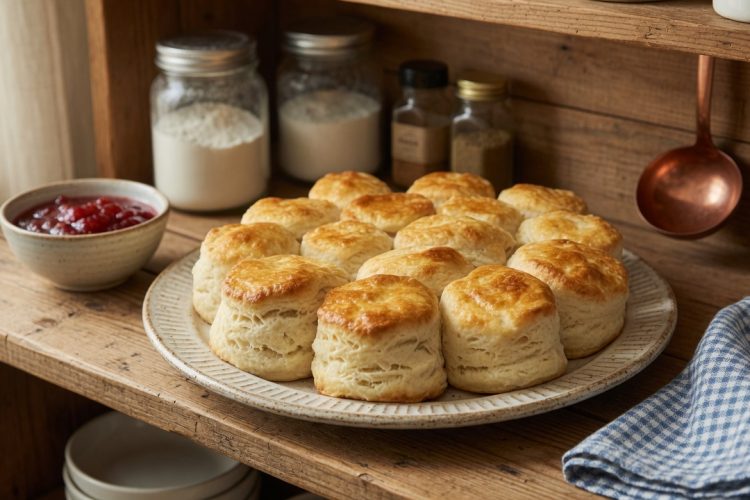
When you’re following a gluten-free diet, finding baked goods that match the texture and flavor of traditional recipes can feel challenging. These gluten-free buttermilk biscuits solve that problem completely by delivering the same soft, flaky, buttery results you expect from classic homemade biscuits. The recipe uses a quality gluten-free flour blend along with cold butter and tangy buttermilk to create biscuits with golden tops and tender interiors full of delicate layers. Whether you need gluten-free options due to celiac disease, gluten sensitivity, or personal preference, these biscuits taste so good that everyone at your table will enjoy them regardless of dietary restrictions.
Understanding What Makes Biscuits Flaky
The flaky texture that makes biscuits so appealing comes from the way cold butter interacts with the dough during baking. When you cut cold butter into flour, small pieces of butter get distributed throughout the mixture. As the biscuits bake in the hot oven, the butter melts and releases steam, which pushes the dough apart and creates thin, crispy layers. This same technique works in pie crusts and puff pastry. For the best results, you need to keep the butter as cold as possible throughout the entire mixing process. Some people even freeze their butter and grate it into the flour, though simply cutting it into small cubes and working quickly also produces excellent results.
Why Buttermilk Is Essential
Buttermilk does several important jobs in this biscuit recipe that regular milk cannot accomplish. The acidity in buttermilk reacts with the baking soda to create carbon dioxide bubbles that help the biscuits rise and become light and fluffy. This acidic component also tenderizes the gluten-free flour proteins, which contributes to the soft texture. Buttermilk adds a subtle tangy flavor that balances the richness of the butter and prevents the biscuits from tasting too heavy. The cold temperature of the buttermilk also helps keep the butter from melting before the biscuits go into the oven. If you don’t have buttermilk, you can make a substitute by adding one tablespoon of lemon juice or white vinegar to regular milk and letting it sit for five minutes.
Selecting the Right Gluten-Free Flour
Not all gluten-free flours work the same way in baking, so choosing the right blend makes a significant difference in your final results. Look for a gluten-free all-purpose flour blend specifically designed for baking rather than single-ingredient flours like rice flour or almond flour alone. Quality blends typically combine several different flours and starches to mimic the properties of wheat flour. Most good blends include xanthan gum or guar gum, which act as binders that replace the stretchy gluten network that wheat flour naturally creates. If your flour blend doesn’t contain xanthan gum, you’ll need to add about one teaspoon to this recipe to help the biscuits hold together properly and develop the right texture.
The Importance of Cold Ingredients
Temperature control is one of the most critical factors in making successful biscuits, whether they contain gluten or not. Both the butter and buttermilk need to stay very cold throughout the mixing process. Warm butter will blend into the flour completely instead of staying in distinct pieces, which eliminates the flaky layers that make biscuits so appealing. Some bakers chill their mixing bowl and even their flour in the refrigerator before starting. Cutting the butter into cubes ahead of time and returning it to the refrigerator until you’re ready to use it helps maintain the cold temperature. Working quickly when mixing the dough also prevents your warm hands from melting the butter before the biscuits reach the oven.
Mixing the Dough Correctly
The way you handle biscuit dough directly affects the texture of the finished product. Overmixing develops the proteins in the flour, which creates tough, dense biscuits instead of tender, light ones. You want to mix just until the wet and dry ingredients come together into a shaggy dough that barely holds together. The dough should look rough and slightly uneven rather than smooth and uniform. Some dry patches or streaks of flour are fine because they’ll incorporate when you pat out the dough. Resist the urge to knead the dough like you would for bread, as this extra handling will make the biscuits heavy. Gentle treatment produces the best results.
Why Chilling Time Matters
After mixing the dough, refrigerating it for fifteen minutes might seem like an unnecessary step when you’re hungry, but this short rest period significantly improves the final biscuits. Chilling firms up the butter again after it may have softened slightly during mixing. This ensures those important butter pieces stay solid when you cut and shape the biscuits. The cold dough is also much easier to work with because it’s less sticky and holds its shape better when you roll or pat it out. The resting time also allows the flour to fully hydrate and absorb the liquid, which creates a more cohesive dough. If you’re in a real hurry, you can skip this step, but the biscuits will turn out noticeably better if you take the time to chill the dough.
Creating Layers Through Folding
Folding the dough several times before cutting the biscuits is the secret technique that professional bakers use to create extra flaky layers. After you pat the dough into a rectangle, fold it like a letter by bringing one third over the middle, then folding the other third on top. Pat it back out to the original thickness and repeat this folding process two or three times. Each fold creates additional layers of butter and dough that will separate during baking. This technique, called laminating, is the same method used for croissants and puff pastry, though in a much simpler form. The extra minute this takes makes a dramatic difference in how your biscuits look and taste.
Cutting Biscuits Properly
The way you cut biscuits affects how high they rise in the oven. Using a sharp biscuit cutter or drinking glass, press straight down through the dough in one quick motion. Lifting the cutter straight back up without twisting is important because twisting seals the edges and prevents the biscuits from rising evenly. The open, clean-cut edges allow the layers to separate and the biscuits to climb upward as they bake. Dipping your cutter in flour between cuts helps prevent sticking. When you’ve cut as many biscuits as possible from the first rolling, gently press the scraps together and cut again. These second-cut biscuits won’t be quite as pretty, but they’ll still taste delicious.
Arranging Biscuits on the Pan
How you arrange biscuits on the baking sheet changes their final texture. Placing them close together so they’re almost touching creates soft, tender sides because the biscuits support each other as they rise. This arrangement works well if you’re planning to split the biscuits for sandwiches or if you prefer a softer texture overall. Spacing the biscuits about two inches apart allows air to circulate all around each one, which creates crispy, golden edges on all sides. This method produces biscuits with more crust and a slightly different texture. Neither way is wrong—it simply depends on your personal preference for how you want the finished biscuits to be.
Baking at the Right Temperature
Biscuits need high heat to rise properly and develop that beautiful golden color. Preheating your oven to 425 degrees Fahrenheit ensures the biscuits start baking immediately when they go in, which helps them rise tall before the structure sets. Lower temperatures produce flatter, denser biscuits that don’t have the same appealing texture. Baking on the middle rack promotes even heat distribution. Every oven runs slightly differently, so checking the biscuits after fifteen minutes helps prevent overbaking. They should be golden brown on top and feel firm when you gently press the tops. Underbaked biscuits will be doughy inside, while overbaked ones become dry and crumbly.
Finishing with Melted Butter
Brushing the hot biscuits with melted butter immediately after they come out of the oven serves multiple purposes. The butter adds extra richness and flavor while creating an attractive shiny finish. The moisture from the butter also keeps the tops from becoming too dry or crusty. Some people like to add a pinch of flaky sea salt to the butter for a sweet and salty combination, while others stir in minced garlic and herbs for savory biscuits. This final butter coating also helps biscuits stay soft if you’re storing them for later rather than eating them immediately. The butter soaks in slightly while the biscuits are still warm, which enhances every bite.
Serving Fresh Biscuits
Biscuits taste best when they’re still warm from the oven, which is when the texture is at its peak. The outside is crispy and golden while the inside stays soft and fluffy. Splitting them open reveals steam and layers that pull apart easily. At this temperature, butter melts into the biscuits immediately, and honey or jam spreads beautifully. If you’re serving biscuits for breakfast, consider making them the last thing you prepare so they come to the table fresh and hot. For dinner, you can bake them while the main dish rests after cooking. Even fifteen minutes makes a difference in how biscuits taste and feel.
Adding Different Flavors
The basic biscuit recipe is delicious on its own, but adding mix-ins creates variety and lets you customize the biscuits for different meals. Stirring a cup of shredded cheddar cheese and some chopped fresh herbs into the dough makes savory biscuits perfect for serving with soup or chili. Adding a tablespoon of sugar and some cinnamon creates a lightly sweet version great for breakfast. Mixing in crumbled cooked bacon gives you bacon biscuits that need nothing more than butter. Diced jalapeños and pepper jack cheese create spicy biscuits for people who like heat. These additions should be folded in gently after cutting in the butter and before adding the liquid ingredients.
Storing Biscuits Properly
While biscuits are definitely best fresh, proper storage helps maintain quality if you need to keep them for a day or two. Once the biscuits have cooled completely to room temperature, place them in an airtight container or resealable plastic bag. Storing them at room temperature works fine for up to two days. The container prevents them from drying out or absorbing other flavors. If you need to keep them longer, refrigeration extends their life to about five days, though the texture becomes slightly denser. Wrapping individual biscuits in plastic wrap before placing them in a container makes it easy to grab one at a time for quick breakfasts or snacks.
Freezing for Long-Term Storage
Biscuits freeze beautifully, which makes this recipe perfect for batch cooking. After baking and cooling the biscuits completely, wrap each one individually in plastic wrap or aluminum foil. Place all the wrapped biscuits in a large freezer bag, squeeze out the excess air, and seal tightly. Label the bag with the date so you know how long they’ve been frozen. Properly wrapped biscuits maintain their quality in the freezer for up to three months. You can also freeze unbaked biscuits by cutting them out, placing them on a baking sheet in the freezer until solid, then transferring them to a freezer bag. Bake frozen unbaked biscuits directly from the freezer, adding a few extra minutes to the cooking time.
Reheating to Restore Freshness
Frozen or refrigerated biscuits won’t have exactly the same texture as fresh ones, but proper reheating brings them pretty close. For the best results, thaw frozen biscuits in the refrigerator overnight rather than at room temperature, which helps prevent them from becoming soggy. Wrap the biscuits loosely in aluminum foil and warm them in a 350-degree oven for five to seven minutes until heated through. The foil prevents the outsides from drying out while the insides warm up. You can also microwave individual biscuits for fifteen to twenty seconds, though this creates a softer texture without the crispy exterior. Splitting reheated biscuits and toasting them cut-side down in a dry skillet restores some of the original crispy texture.
Using Biscuits in Different Meals
These versatile gluten-free biscuits work in many different meal contexts beyond the obvious breakfast option. Split them horizontally and use them as the base for breakfast sandwiches filled with eggs, cheese, and breakfast meat. Turn them into chicken biscuits by tucking fried chicken inside for lunch. Make biscuits and gravy for a hearty brunch dish. Serve them alongside fried chicken, roast beef, or pork chops for dinner. Use them to soak up the sauce from stews, chilis, or curries. Turn them into shortcakes by splitting them and filling them with fresh berries and whipped cream for dessert. Their mild flavor and tender texture make them suitable for both sweet and savory applications throughout the day.
Troubleshooting Common Problems
Sometimes biscuits don’t turn out quite right, but understanding what went wrong helps you fix it next time. Dense, heavy biscuits usually mean the dough was overmixed or the butter wasn’t cold enough. Flat biscuits that don’t rise often result from old baking powder or baking soda that has lost its effectiveness, or from twisting the cutter when cutting the dough. Dry, crumbly biscuits typically happen when you use too much flour or don’t add enough liquid. Biscuits that spread instead of rising tall might mean the butter was too soft when you mixed the dough. Uneven browning usually indicates an oven with hot spots or biscuits placed too close to the heating element.
Why Gluten-Free Baking Is Different
Baking without gluten requires some adjustments because gluten provides structure and elasticity that gluten-free flours don’t naturally have. Wheat flour develops gluten when mixed with liquid, which creates stretchy strands that trap air and give baked goods their structure. Gluten-free flours lack this protein, so they need help from ingredients like xanthan gum or guar gum to mimic that binding quality. Gluten-free doughs also tend to be stickier and more fragile than wheat-based doughs. Understanding these differences helps you adjust your expectations and techniques. With the right recipe and ingredients, gluten-free baked goods can be just as delicious as traditional versions, though they may look and feel slightly different.
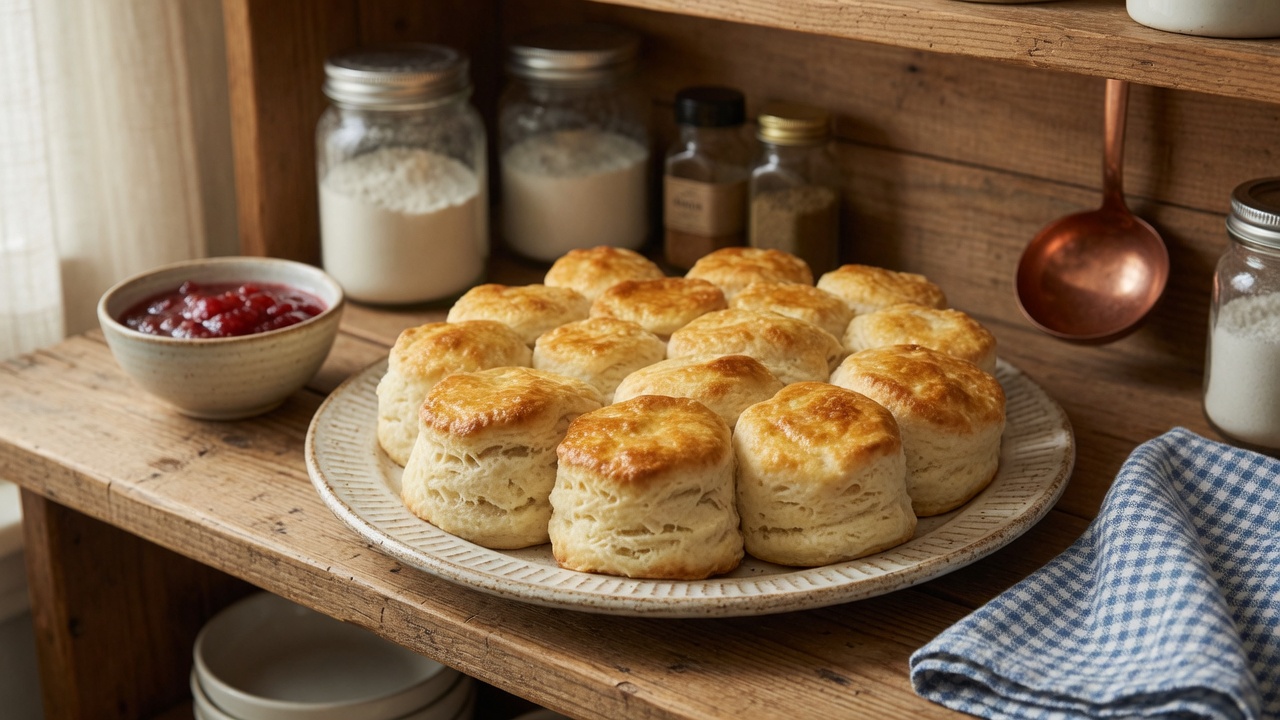
Gluten-Free Buttermilk Biscuits
Soft, flaky, buttery biscuits made with gluten-free flour, cold butter, and tangy buttermilk for a tender texture with golden tops and delicate layers.
10-12
servings20
minutes40
minutes210
kcal16
minutes1
hour16
minutesIngredients
- For the Biscuit Dough:
2½ cups (315g) gluten-free all-purpose flour blend with xanthan gum
1 tablespoon baking powder
½ teaspoon baking soda
1 teaspoon salt
1 tablespoon granulated sugar
½ cup (115g) cold unsalted butter, cubed
1 cup (240ml) cold buttermilk
1 large egg
- For Brushing:
2 tablespoons melted butter
Directions
- Preheat and prepare: Set oven to 425°F (220°C). Line a baking sheet with parchment paper.
- Mix dry ingredients: Whisk together gluten-free flour, baking powder, baking soda, salt, and sugar in a large bowl until evenly combined.
- Cut in butter: Add cold butter cubes to flour mixture. Using a pastry cutter or two forks, work butter into flour until mixture resembles coarse crumbs with pea-sized butter pieces remaining.
- Add wet ingredients: Whisk together cold buttermilk and egg in a separate bowl. Pour into flour mixture and gently stir until a soft, slightly sticky dough forms. Do not overmix.
- Chill dough: Cover bowl and refrigerate for 15 minutes to firm up the butter and make dough easier to handle.
- Shape and fold: Turn dough onto a lightly floured surface and pat into a 1-inch thick rectangle. Fold dough over itself 2-3 times, then pat back to 1-inch thickness. Cut biscuits using a biscuit cutter, pressing straight down without twisting. Arrange on prepared baking sheet.
- Bake and finish: Bake for 15-18 minutes until biscuits are risen and golden brown on top. Immediately brush tops with melted butter. Cool for 5 minutes before serving.
Notes
- Use gluten-free flour blend that contains xanthan gum; if yours doesn’t, add 1 teaspoon to the recipe
Nutrition Facts
- Calories: 210kcal
- Fat: 10g
- Carbohydrates: 26g
- Fiber: 2g
- Sugar: 2g
- Protein: 4g


