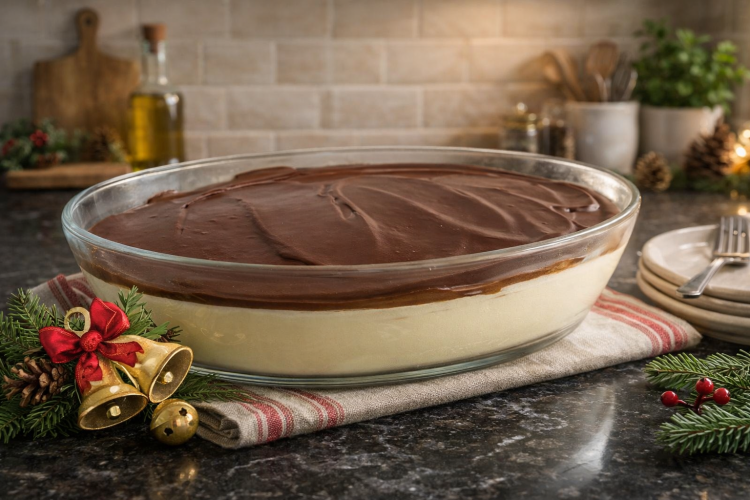
When you’re searching for a dessert that doesn’t require baking but still impresses everyone who tastes it, this creamy passion fruit and chocolate dessert deserves your attention. The beauty of this recipe lies in its simplicity—you don’t need special baking skills, expensive equipment, or hours of preparation time. Instead, you gather just a few basic ingredients, blend them together, and let the refrigerator do the work. This approach to dessert making appeals to busy people who want to serve something homemade without the stress and heat of using an oven. The result is a dessert that tastes like you spent hours in the kitchen when you actually spent just minutes assembling it. Whether you’re planning ahead for a dinner party or satisfying a sudden craving for something sweet, this dessert adapts beautifully to your schedule.
Understanding the Appeal of No-Bake Desserts During Warm Weather
No-bake desserts solve a real problem that many people face, especially during summer months when turning on the oven seems unbearable. Using your oven heats up your kitchen, making your air conditioning work harder and adding unnecessary expense. A no-bake dessert like this one keeps your kitchen cool while still delivering something delicious to your table. This makes it particularly popular during warm seasons when people want refreshing foods that don’t require heat-generating cooking methods. The chilled nature of this dessert also makes it naturally refreshing, providing comfort food that actually cools you down rather than heating you up. Beyond the practical advantages, no-bake desserts often have lighter, fluffier textures compared to baked goods because they don’t experience the drying effects of oven heat. This particular dessert showcases these texture advantages beautifully, with its cloud-like cream filling and silky chocolate topping.
Why Tropical Flavors Work So Well in Modern Desserts
Passion fruit brings something special to desserts that more traditional flavors sometimes miss—a brightness and exotic appeal that makes people feel like they’re eating something special. Tropical fruits have become increasingly popular in home cooking because they add adventure to familiar dessert formats. The tartness of passion fruit balances sweetness perfectly, preventing the dessert from tasting one-dimensional or cloying. This flavor complexity makes people enjoy the dessert more fully, with each bite revealing different taste notes. The tropical association also gives the dessert a vacation-like quality that makes it feel more indulgent than it actually is. Using passion fruit drink powder makes achieving this exotic flavor incredibly easy since you don’t need to source fresh passion fruit, which can be expensive and difficult to find depending on your location. The powder dissolves completely into the cream, distributing the flavor evenly throughout the entire dessert.
Understanding Sweetened Condensed Milk’s Role in Creamy Desserts
Sweetened condensed milk serves multiple important functions in this dessert beyond simply adding sweetness. This ingredient provides richness and a luxurious mouthfeel that makes the dessert taste indulgent. The condensed milk also helps create the perfect consistency—thick enough to hold its shape but creamy enough to feel smooth on your tongue. Condensed milk contains milk solids and fat that create a dessert texture impossible to achieve with regular milk or cream alone. The slight caramel notes in sweetened condensed milk add depth to the flavor profile. Using this ingredient means you don’t need to cook anything, boil anything, or use specialized equipment like an ice cream maker. The sweetness level in condensed milk means you might not need any additional sweetener, though passion fruit drink powder usually contains sugar that contributes to overall sweetness. This ingredient has been used in Latin American and Asian desserts for decades because it produces consistently creamy, satisfying results.
Exploring Heavy Cream and Table Cream as Key Ingredients
Heavy cream or table cream creates the fluffy, mousse-like texture that makes this dessert so appealing. When you blend cream with sweetened condensed milk and drink powder, the whipping action creates tiny air bubbles that lighten the mixture significantly. These air bubbles are what give the filling its characteristic fluffy texture that feels luxurious on your palate. Using canned cream offers convenience and consistency—you know exactly how much fat content you’re working with every time. The cream also combines with the blended ingredients to create a stable mixture that holds together well when chilled. Some recipes specify “table cream” which typically contains between eighteen and thirty-five percent fat content, while “heavy cream” usually sits at the higher end of that range. Both work well in this recipe, though heavier cream creates slightly thicker results. The choice between fresh and canned cream doesn’t significantly affect the final result, making this recipe flexible for different preferences and what’s available in your local stores.
Why Dark Chocolate Creates the Perfect Contrast
Dark chocolate serves as the finishing layer that creates visual appeal and flavor contrast. The rich, slightly bitter notes of dark chocolate balance the sweet, fruity flavors in the cream layer beneath. This contrast makes the dessert more interesting to eat because your palate experiences multiple flavor dimensions with each bite. Dark chocolate also contains less sugar than milk chocolate varieties, preventing the dessert from becoming overly sweet. Melting high-quality dark chocolate creates a ganache with a glossy, professional appearance that elevates the dessert’s presentation. The chocolate layer also provides structure, making the dessert easier to slice and serve compared to having just a creamy filling. As the chocolate cools, it forms a slightly firm shell that contrasts beautifully with the creamy filling underneath. Choosing chocolate with higher cocoa content produces a more sophisticated flavor, though the specific percentage you choose depends on personal preference for chocolate intensity.
Understanding How Ganache Creates Professional-Looking Layers
Ganache represents a simple but impressive technique that home cooks often think requires special skills but actually just involves melting chocolate and mixing it with cream. The combination creates a smooth, pourable consistency that transforms basic ingredients into something that looks bakery-made. Creating ganache properly requires melting chocolate slowly to prevent it from becoming grainy or separated. Whether you use a microwave with careful timing or a double boiler, the key is never allowing the chocolate to get too hot. Once melted, stirring in the cream produces a smooth, glossy mixture that pours easily over the prepared cream layer. The ganache cools and sets as it chills, creating a firm but still creamy layer that provides textural contrast. Understanding how ganache works opens up countless dessert possibilities beyond this single recipe, making it a technique worth mastering.
The Importance of Proper Chilling for Texture and Sliceability
Chilling represents the final and crucial step that transforms blended ingredients into an actual dessert with proper texture and structure. During the chilling period, both the cream layer and chocolate ganache firm up, developing the structure necessary to slice cleanly. A one-hour minimum chill time produces an adequately firm dessert, but overnight chilling creates superior results. The longer chilling period allows all flavors to meld together more completely, producing better taste integration. Cold temperatures also make slicing easier because cold cream and chocolate don’t smear or tear the way they might at room temperature. The cold serving temperature also enhances the refreshing quality of the dessert, making it particularly appealing as a finish to warm meals. Planning to chill overnight if you’re preparing this for an important occasion removes any timing stress on the day itself.
Exploring Flavor Variations That Work Beautifully
The basic framework of this dessert works with countless flavor combinations, giving you flexibility to match the dessert to your preferences or available ingredients. Strawberry powder creates a classic berry version that appeals to traditional tastes. Lemon brings brightness and sophistication, pairing beautifully with dark chocolate. Mango introduces tropical sweetness that feels vacation-like. Pineapple adds tartness along with tropical appeal. Mixed berry provides complexity from multiple fruit flavors. Orange creates a familiar citrus combination that feels modern. Peach offers subtle sweetness that feels more refined than some other options. Coconut brings tropical warmth and richness. Raspberry provides tartness along with sophisticated berry flavor. Vanilla creates a classic combination that pairs with any chocolate. Experimenting with different combinations helps you discover personal favorites and keeps the recipe from becoming repetitive.
Understanding How Chocolate Variety Changes the Dessert
While dark chocolate works beautifully in the original recipe, exploring other chocolate options opens up different flavor combinations. White chocolate with lemon cream creates a bright, sophisticated pairing that feels elegant. Milk chocolate with strawberry cream produces a more traditional, familiar flavor combination. Bittersweet chocolate with orange cream creates a complex, grown-up dessert. Dark chocolate with mango cream balances richness against tropical sweetness. Semi-sweet chocolate with mixed berry creates a balanced option between milk and dark chocolate’s different characteristics. Each chocolate choice changes the overall flavor profile and appeals to different taste preferences within your family.
Why Storage Instructions Matter for Food Safety
Properly storing your dessert ensures it remains safe to eat while maintaining the best possible texture and flavor. Refrigerating in a tightly covered container prevents odor absorption from other foods in your refrigerator. The dessert remains fresh for up to four days when properly stored, making it suitable for advance preparation. Covering it prevents the cream layer from absorbing moisture from the refrigerator environment. While freezing is technically possible, the texture changes somewhat during thawing, so refrigeration is the preferred storage method. If you do freeze the dessert, thawing it overnight in the refrigerator before serving produces better results than thawing at room temperature.
Perfect Beverages to Serve Alongside This Dessert
Choosing the right beverage to serve with your dessert enhances the overall eating experience. Freshly brewed coffee provides a classic pairing that helps balance the sweetness. Espresso offers intensity that complements dark chocolate beautifully. Cappuccino adds creamy coffee flavor that works with both layers. Black tea brings subtle tannins that contrast with sweetness. Green tea provides a lighter, more delicate pairing. Iced coffee offers refreshing appeal, especially on warm days. Tropical fruit juice echoes the fruit flavors in the dessert. Sparkling lemonade creates a light, refreshing combination that feels summery. The beverage choice really depends on personal preference and what feels right for the occasion.
Decorating Ideas That Add Visual Appeal
While this dessert looks beautiful plain, adding garnishes just before serving creates an extra-special presentation. Fresh passion fruit pulp adds authentic flavor and beautiful appearance if you can source fresh passion fruit. Chocolate curls created by shaving chocolate with a vegetable peeler add elegance. Chocolate shavings offer a quicker alternative that still looks impressive. White chocolate drizzle creates visual contrast against dark chocolate. A dusting of cocoa powder adds sophistication without affecting taste much. Fresh strawberries add color and freshness. Blueberries provide small pops of color and tartness. Mango cubes echo the tropical theme if using mango filling. Toasted coconut flakes add texture and flavor. Mint leaves provide freshness and green color. Crushed chocolate cookies add crunch and visual interest. Chopped roasted nuts add texture and nutrition. You can decorate the entire dessert for serving at a table or garnish individual servings for a more personalized presentation.
Why This Dessert Works for Different Types of Gatherings
From casual family dinners to formal celebrations, this dessert adapts beautifully to any occasion. For birthdays, you can customize the flavor to match the person’s preferences or the overall party theme. Holiday meals benefit from the elegant presentation and advance-preparation option. Family dinners gain an impressive dessert option that didn’t require spending hours in the kitchen. Potlucks allow you to contribute something special that travels easily and serves multiple people. Picnics appreciate the portability and non-melting nature compared to some frozen desserts. Baby showers call for elegant, sophisticated desserts, which this definitely provides. Weekend gatherings often feature this dessert because it removes the stress of last-minute baking. Summer celebrations appreciate the cool, refreshing nature of a chilled dessert. The versatility means you’ll find yourself making this recipe repeatedly for different occasions.
Understanding Serving Size and Portioning
This recipe creates enough dessert to feed ten to twelve people comfortably as an individual dessert portion. If you’re serving it alongside other desserts or as a lighter course, you might be able to stretch it to feed more people. The nine-by-thirteen-inch dish size represents the standard for this quantity, making portioning straightforward. Using a sharp knife wiped clean between slices creates neat portions that look more professional than jagged cuts. Serving from a glass dish allows guests to see the beautiful layers, adding to the visual appeal. If you want smaller portions, you can cut the dessert into smaller squares. Serving it from individual bowls with a spoon instead of plating it onto dishes creates a more casual presentation suitable for family meals.
Why Glass Serving Dishes Matter for Presentation
Choosing a glass serving dish rather than ceramic or opaque containers makes a meaningful difference in how your dessert looks. Glass allows everyone to see the beautiful contrast between the golden cream layer and the dark chocolate topping. This visual appeal adds to the overall eating experience and makes guests feel like you’ve put extra thought into presentation. Glass also conducts temperature evenly, helping the dessert maintain proper chilling. You can see how much dessert remains at a glance. Glass is also incredibly easy to clean compared to some other materials. The investment in a quality glass baking dish pays off through repeated use for this recipe and countless other desserts. The professional appearance that glass provides makes this dessert appropriate for serving to guests despite its simple preparation.
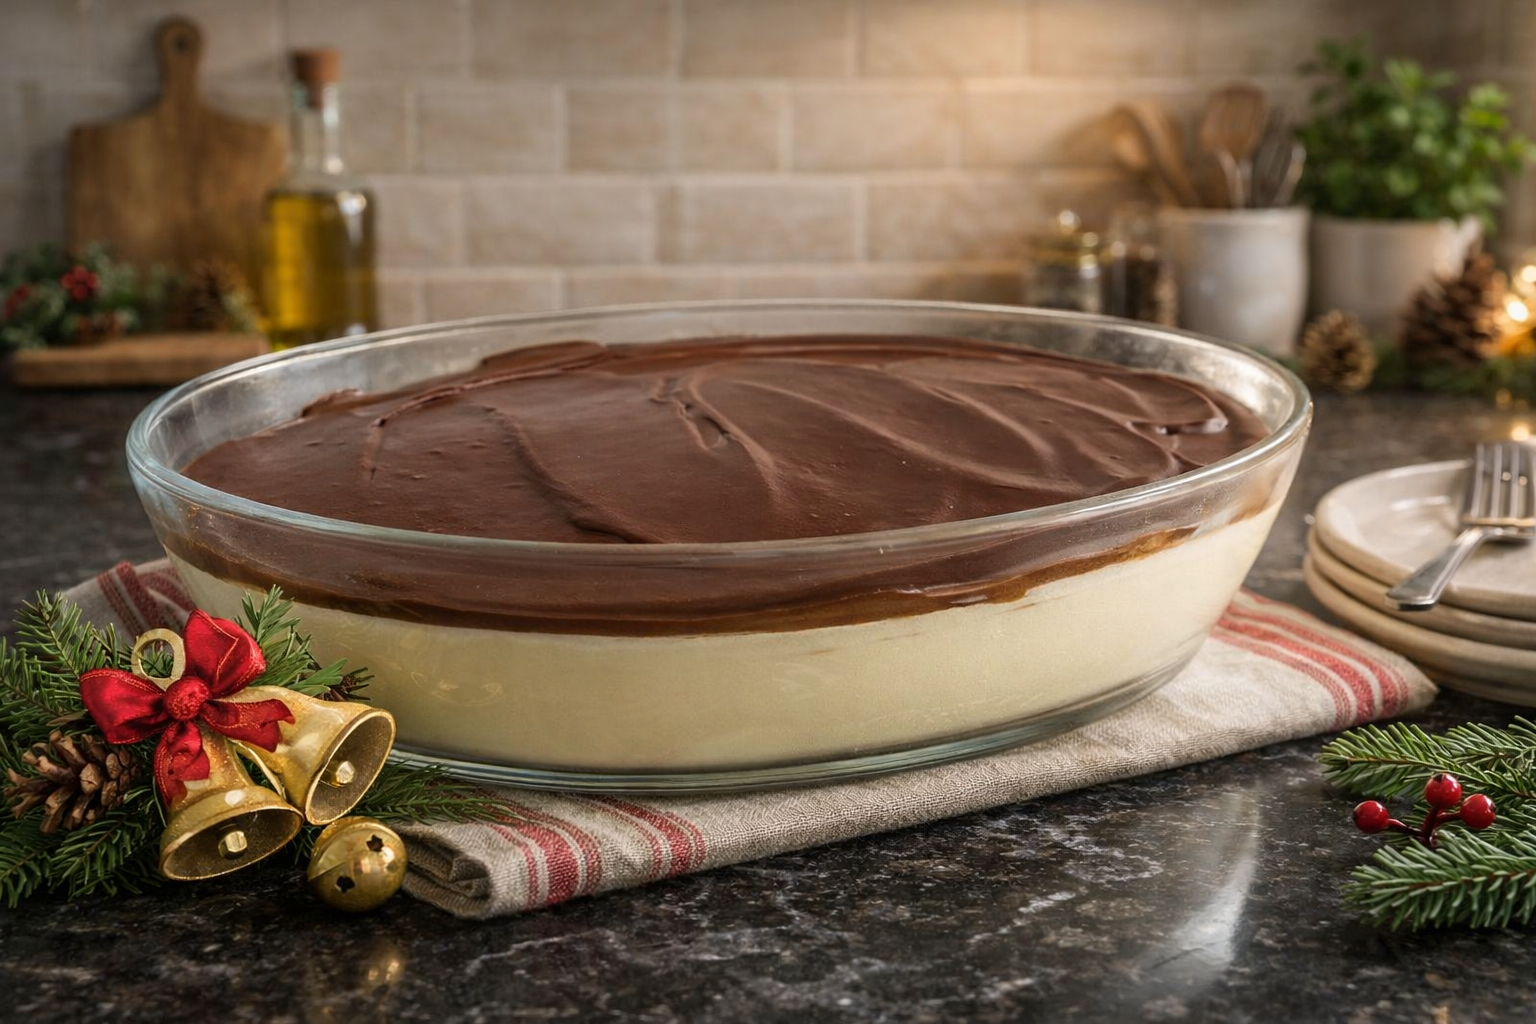
Keto Fruit and Chocolate Dessert
Perfect for warm weather when you want to avoid using your oven, this dessert can be prepared in advance and chilled until serving time. With its tropical flavors and sophisticated appearance, this is the kind of dessert that makes people ask for your recipe.
15
minutes1
hour30
minutes5
minutes1
hour50
minutesIngredients
- For the Passion Fruit Cream Layer:
3 cans (about 200 grams each) heavy cream or table cream
2 cans (395 grams each) sweetened condensed milk
2 packets passion fruit-flavored drink powder
- For the Chocolate Ganache Topping:
200 grams dark chocolate (finely chopped)
1 box (200 grams) heavy cream or table cream
Directions
- Pour all three cans of cream into your blender container. Add both cans of sweetened condensed milk directly to the cream. Measure out the two packets of passion fruit drink powder and set them nearby so you can add them quickly. Before starting the blender, make sure the lid is secure and you have a safe place to work where the blender won’t get knocked over during operation. Having everything ready before you start means the blending process moves smoothly.
- Add the passion fruit drink powder to the blender and secure the lid firmly. Start blending on low speed for about thirty seconds to begin combining the ingredients. Gradually increase to high speed and blend for the full five minutes. This extended blending time is crucial because it fully dissolves the drink powder while whipping air into the cream, creating that light, fluffy texture. The mixture should transform from a liquid into something noticeably thicker and lighter in color. When finished, the cream should be pale yellow with a mousse-like consistency.
- Pour the blended passion fruit cream mixture into your nine-by-thirteen-inch glass serving dish. Use a silicone spatula or the back of a spoon to spread the mixture evenly across the entire bottom surface. Take time to smooth it into a uniform layer because this creates a neat, professional look for the finished dessert. Once spread evenly, set the dish aside on a stable shelf while you prepare the chocolate ganache topping.
- Place the finely chopped dark chocolate into a microwave-safe bowl. If using a microwave, heat the chocolate in thirty-second intervals, stirring thoroughly after each interval until the chocolate melts completely and becomes smooth. Alternatively, place the bowl over a pot of gently simmering water, making sure the bottom of the bowl doesn’t touch the water. Stir frequently until the chocolate melts completely. Never allow the chocolate to get too hot, as this can cause it to become grainy or lose its shine.
- Place the finely chopped dark chocolate into a microwave-safe bowl. If using a microwave, heat the chocolate in thirty-second intervals, stirring thoroughly after each interval until the chocolate melts completely and becomes smooth. Alternatively, place the bowl over a pot of gently simmering water, making sure the bottom of the bowl doesn’t touch the water. Stir frequently until the chocolate melts completely. Never allow the chocolate to get too hot, as this can cause it to become grainy or lose its shine.
- Pour the chocolate ganache carefully over the chilled cream layer. Use a spatula or spoon to spread it gently and evenly across the entire surface, working slowly to avoid pushing down into the cream layer below. Cover the dish with plastic wrap or a fitted lid. Place it in the refrigerator for at least one hour, though overnight chilling produces the best results. During this time, both layers firm up, creating a dessert that slices cleanly and holds its shape beautifully.
Notes
- Serving Temperature and Beverage Pairing: Serve the dessert cold directly from the refrigerator for best texture and refreshment. Pair it with freshly brewed coffee, espresso, iced coffee, black tea, or sparkling lemonade depending on the time of day and season.


