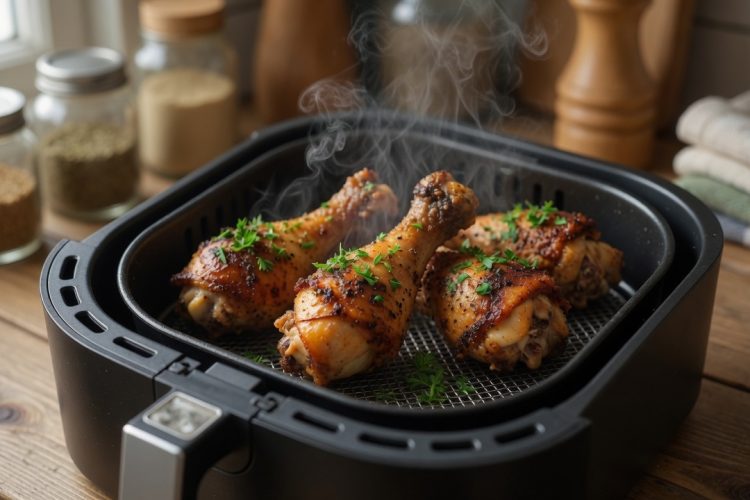
Chicken drumsticks cooked in an air fryer deliver crispy skin and tender, juicy meat every time. This recipe takes less than 15 minutes from start to finish, making it perfect for busy weeknights. The seasoning blend is simple but creates layers of flavor that taste like you spent hours in the kitchen.
Air frying uses much less oil than traditional frying methods while still giving you that satisfying crunch. You can have dinner on the table faster than ordering takeout with much better nutritional value.
What Makes This Chicken Recipe Special
The secret to extra crispy skin is adding baking powder to your seasoning mix. This simple ingredient changes the pH level of the chicken skin, helping it brown and crisp up faster. You only need basic pantry spices that you probably already have on hand.
The combination of smoked paprika, Italian seasoning, and a touch of brown sugar creates a balanced flavor. Unlike deep-fried chicken that soaks up oil and calories, air fryer drumsticks stay light. The meat inside stays incredibly moist while the outside gets perfectly crispy.
Choosing the Right Chicken Pieces
Drumsticks and chicken legs work equally well in this recipe. Look for pieces with the skin still on for the best texture and flavor. Skinless drumsticks will cook but won’t get that desirable crispy exterior. Choose pieces that are similar in size so they cook evenly at the same time.
Fresh or thawed frozen chicken both work fine as long as the pieces are completely dry. Bone-in chicken has more flavor than boneless cuts and stays juicier during cooking.
Understanding the Ingredient List
You need just a handful of ingredients to make these flavorful drumsticks. Olive oil helps the seasonings stick and promotes browning, but any cooking oil works. Smoked paprika adds a subtle smoky flavor without overpowering the chicken. Italian seasoning provides herbs like oregano, basil, and thyme for depth.
Garlic powder and onion powder give savory notes that complement the chicken perfectly. The small amount of brown sugar balances the spices and helps with caramelization.
Why Baking Powder Works So Well
Baking powder is not just for baking cakes and cookies. When applied to chicken skin, it draws out moisture and creates a drier surface. Dry skin crisps up much better than wet skin when exposed to high heat. The alkaline nature of baking powder also helps break down proteins in the skin. This allows the skin to render fat more efficiently and become extra crunchy. Just two teaspoons make a noticeable difference without affecting the taste of the chicken.
Preparing Your Air Fryer Properly
Preheating the air fryer is an important step that many people skip. Five minutes of preheating ensures the cooking chamber reaches the right temperature. Starting with a hot air fryer means the chicken begins cooking immediately when you add it. This quick start helps seal in juices and creates that crispy exterior faster. Set your air fryer to 400°F or 200°C for this recipe. Different air fryer models may vary slightly, so know your machine’s specific settings.
Seasoning the Chicken Correctly
Pat the drumsticks completely dry with paper towels before seasoning. Any moisture on the surface will prevent the skin from crisping properly. Mix all your dry seasonings together in a small bowl first. Toss the dried drumsticks in the spice mixture, making sure every surface is coated. Drizzle the oil over the seasoned chicken and rub it in with your hands. The oil helps the seasonings stick and adds extra crispiness during cooking.
Arranging Drumsticks in the Basket
Place the drumsticks in a single layer with space between each piece. Overcrowding the basket prevents hot air from circulating around all sides. You may need to cook the drumsticks in two batches depending on your air fryer size. Cooking in batches takes a bit longer but gives you much better results. The chicken needs direct contact with the hot air fryer basket to get crispy. Standing drumsticks upright works but doesn’t crisp the skin as effectively as laying them flat.
Timing and Temperature Guidelines
Cook the drumsticks at 400°F for a total of 14 minutes. After 8 minutes, open the air fryer and flip each drumstick over. This ensures both sides get equal exposure to the hot circulating air. The final 6 to 8 minutes finishes cooking the chicken through completely. Use a meat thermometer to check for an internal temperature of 165°F. Insert the thermometer into the thickest part of the meat without touching the bone.
Adjusting for Different Chicken Cuts
Bone-in chicken legs are larger than drumsticks and need slightly longer cooking. Add 2 to 3 minutes to the total cooking time if using full legs. Smaller drumsticks from younger chickens may cook faster, so check them early. Wings would need less time, around 10 to 12 minutes total. Always rely on internal temperature rather than just timing for food safety. Different sized pieces mean you might need to remove some earlier than others.
How to Know When Chicken is Done
The most reliable way to check doneness is using an instant-read thermometer. Insert it into the thickest part of the drumstick, avoiding the bone. The temperature should read 165°F for fully cooked, safe-to-eat chicken. The juices should run clear when you pierce the meat with a knife. The meat should no longer be pink near the bone. If you’re unsure, cook for an extra minute or two rather than serving undercooked chicken.
Letting the Chicken Rest Before Serving
Give the cooked drumsticks a 5-minute rest after removing them from the air fryer. This short resting period allows the juices to redistribute throughout the meat. Cutting into chicken immediately causes all the juices to run out onto the plate. Loosely tent the drumsticks with aluminum foil while they rest. The residual heat will finish cooking them gently without drying them out. This step makes a real difference in how juicy the final chicken tastes.
Making This Recipe in a Regular Oven
You can bake these drumsticks if you don’t have an air fryer. Preheat your oven to 400°F and prepare the chicken exactly as described. Line a baking sheet with parchment paper or aluminum foil for easy cleanup. Arrange the seasoned drumsticks on the baking sheet with space between them. Bake for 20 to 25 minutes, flipping them over halfway through. The oven method takes slightly longer but produces similar crispy results.
Adding Different Sauces and Flavors
These drumsticks are delicious plain or with your favorite dipping sauce. Sugar-free barbecue sauce adds tangy sweetness without extra carbs. Honey mustard provides a sweet and tangy combination that kids love. Hot sauce mixed with melted butter makes buffalo-style drumsticks. You can also marinate the chicken for several hours before cooking. Try different spice blends like Cajun seasoning, curry powder, or ranch seasoning mix.
Serving Suggestions for Complete Meals
Pair these drumsticks with simple side dishes for a balanced dinner. Roasted vegetables like broccoli, green beans, or Brussels sprouts work perfectly. A fresh green salad with vinaigrette keeps the meal light and healthy. Mashed potatoes or cauliflower mash add comfort food appeal. Rice pilaf or quinoa provides filling carbohydrates. Corn on the cob and coleslaw make great summer sides.
Storing Leftover Chicken Safely
Cool leftover drumsticks to room temperature before storing them. Place them in an airtight container and refrigerate within two hours of cooking. Properly stored cooked chicken stays fresh for 4 to 5 days in the refrigerator. Keep the chicken in the coldest part of your fridge, usually the back. Label the container with the date so you remember when you cooked it. Never leave cooked chicken at room temperature for more than two hours.
Freezing for Future Meals
These drumsticks freeze well for quick meals later. Let the cooked chicken cool completely before freezing. Place individual drumsticks in a single layer on a baking sheet and freeze until solid. Transfer the frozen drumsticks to a freezer-safe ziplock bag. Remove as much air as possible before sealing the bag. Frozen cooked chicken stays good for up to 3 months in the freezer.
Reheating for Best Results
The air fryer is the best tool for reheating leftover drumsticks. Preheat the air fryer to 350°F and cook for 3 to 5 minutes. This method restores the crispy skin better than a microwave. If using a microwave, heat for 20 to 30 seconds at a time. Place the chicken on a microwave-safe plate and cover with a damp paper towel. The microwave works for quick reheating but won’t keep the skin crispy.
Common Questions About Food Safety
You should not wash raw chicken before cooking it. Washing spreads bacteria around your sink and countertops through water splashing. Cooking chicken to 165°F kills any harmful bacteria present on the meat. Keep raw chicken separate from other foods in your refrigerator. Use different cutting boards for raw meat and vegetables. Always wash your hands thoroughly after handling raw chicken.
Getting the Crispiest Skin Possible
Several factors contribute to crispy chicken skin in the air fryer. Starting with completely dry chicken is the most important step. The baking powder draws out additional moisture during cooking. Don’t skip the oil, as it helps with browning and crisping. Avoid opening the air fryer too often during cooking, which releases heat. Cook the chicken in a single layer rather than stacking pieces. Higher heat and proper air circulation create the best crispy texture.
Troubleshooting Undercooked Chicken
If your chicken isn’t fully cooked after the recommended time, cook it longer. Add 2 to 3 minutes and check the temperature again. Some air fryers cook less efficiently when the basket is too full. Make sure you’re not overcrowding the basket with too many pieces. Older air fryers may not heat as effectively as newer models. Always use a thermometer rather than relying only on cooking time.
Making This Recipe Work for Meal Prep
Cook a double batch of drumsticks at the beginning of the week. Store them properly in the refrigerator for easy grab-and-go meals. These drumsticks work great in lunch boxes with fresh vegetables. You can eat them cold or reheat them quickly before eating. Prep the seasoning mix ahead and store it in a small jar. This makes it even faster to prepare the chicken on busy nights.
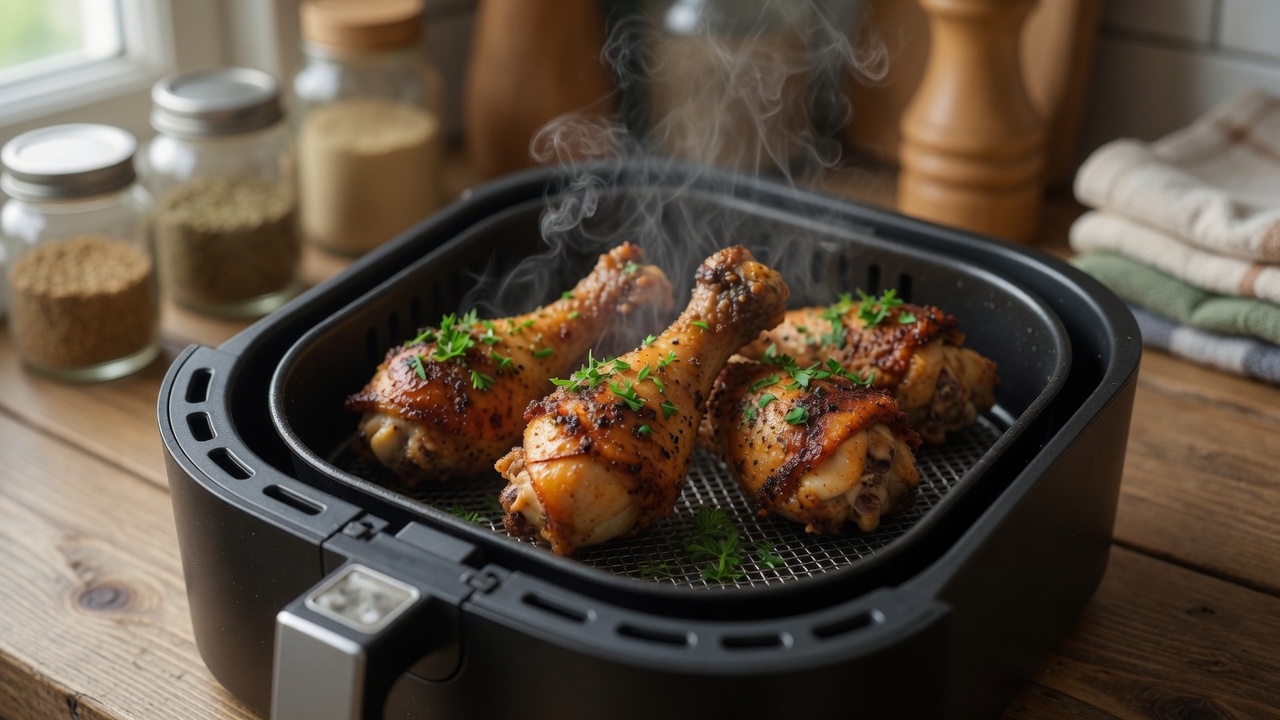
Air Fryer Chicken Drumsticks
Crispy, juicy chicken drumsticks made in the air fryer with a simple seasoning blend. Ready in under 15 minutes with minimal oil for a healthier weeknight dinner option.
6
drumsticks1
minute13
minutes168
kcal1
g14
minutesIngredients
6 chicken drumsticks
2 teaspoons baking powder
1 teaspoon smoked paprika
2 teaspoons Italian seasoning
1 teaspoon garlic powder
1 teaspoon onion powder
1 teaspoon brown sugar
2 tablespoons olive oil
Directions
- Preheat air fryer to 400°F or 200°C for 5 minutes.
- Mix baking powder, smoked paprika, Italian seasoning, garlic powder, onion powder, and brown sugar in a small bowl.
- Pat drumsticks completely dry with paper towels. Toss chicken in spice mixture until evenly coated, then drizzle with olive oil.
- Place drumsticks in air fryer basket in a single layer. Cook for 8 minutes, flip drumsticks, then cook for 6 to 8 minutes more until internal temperature reaches 165°F.
- Let rest for 5 minutes before serving with your favorite sides.
Nutrition Facts
- Calories: 168kcal
- Fat: 12g
- Carbohydrates: 2g
- Protein: 14g


