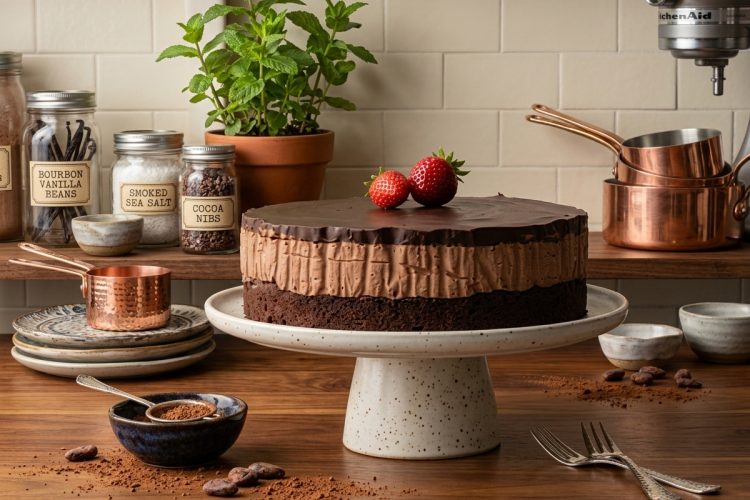
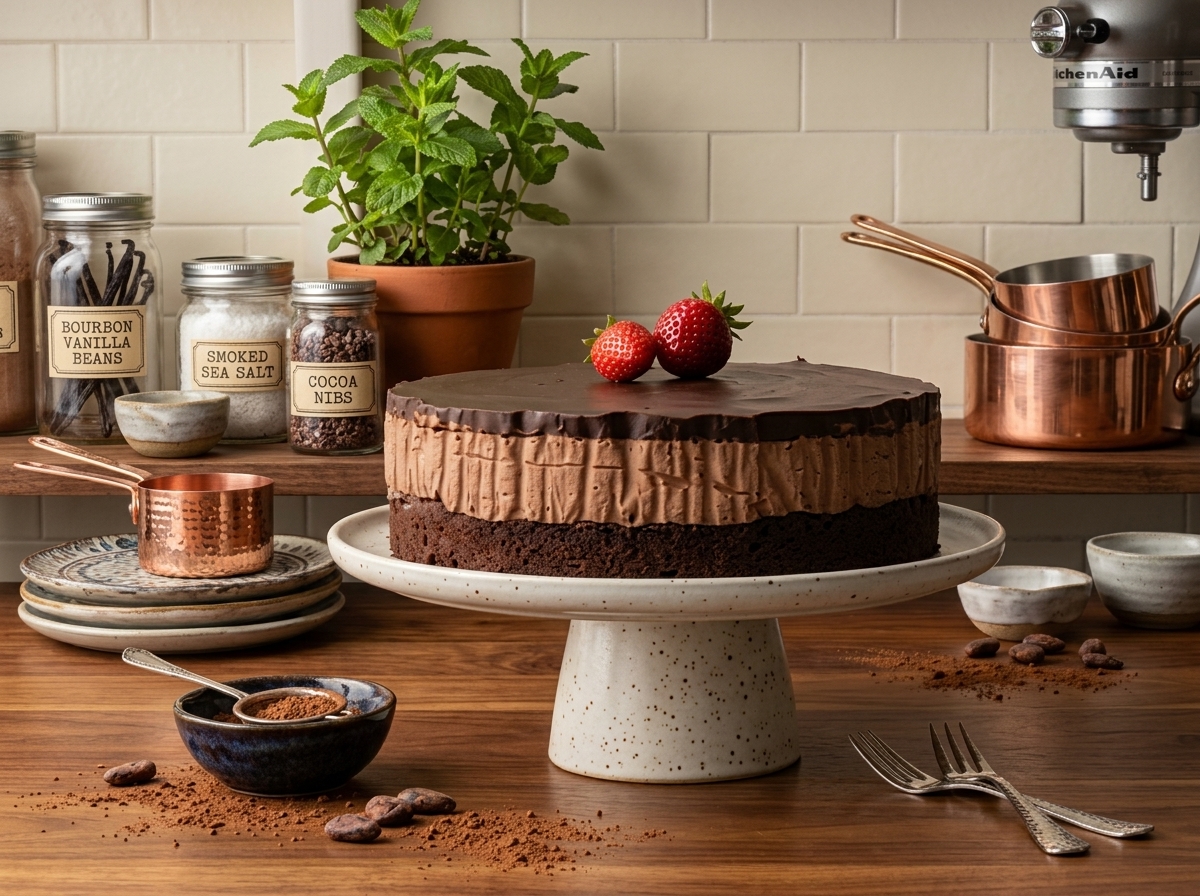
Triple Chocolate Mousse Cake is a rich, elegant dessert featuring three layers of chocolate in one beautiful cake. It starts with a dense, fudgy brownie base, followed by a smooth and airy chocolate mousse filling, and finishes with a glossy semisweet chocolate ganache. Every layer has a different texture, making this homemade chocolate mousse cake a wonderful choice for birthdays, holidays, Valentine’s Day, dinner parties, and other special occasions.
What makes this dessert special is the contrast between its rich brownie base and light, creamy mousse. The chocolate ganache adds another layer of flavor while giving the cake an attractive finish. Although it looks like a bakery-style dessert, you can prepare it at home using familiar baking ingredients and a few simple techniques. The most important part is allowing enough time for the cake to cool and chill between steps.
Why You’ll Love This Triple Chocolate Mousse Cake
Three delicious layers of chocolate
This cake brings together three different chocolate preparations to create a dessert with plenty of flavor and texture. The brownie layer uses unsweetened chocolate and cocoa powder for a deep chocolate taste. The mousse combines semisweet chocolate with whipped cream for a smooth, creamy filling, while the ganache creates a rich topping that completes the cake.
Each layer contributes something different to the finished dessert. The brownie provides a firm foundation, the mousse adds a soft and airy middle, and the ganache brings everything together with a silky chocolate finish. The combination makes every slice satisfying without relying on a traditional thick layer of chocolate frosting.
A light and creamy chocolate mousse filling
The middle layer is an important part of this recipe because it balances the dense brownie base. Whipped heavy cream gives the chocolate mousse its airy consistency, while semisweet chocolate provides a smooth, rich flavor. A small amount of gelatin helps the filling hold its shape after chilling, making it easier to slice and serve.
The mousse should be creamy rather than stiff or rubbery. Properly whipped cream and careful folding help create a soft texture that feels light when eaten. Allowing the chocolate mixture to cool before combining it with the cream is also essential because excessive heat can melt the whipped cream and reduce the mousse’s volume.
A smooth chocolate ganache topping
The final layer is a simple chocolate ganache made with semisweet chocolate, heavy cream, and unsalted butter. Warm cream melts the chopped chocolate, creating a smooth mixture that spreads easily over the chilled mousse. Butter adds richness and helps produce a glossy appearance.
Semisweet chocolate works particularly well here because it adds sweetness without making the entire cake overwhelmingly sugary. Once refrigerated, the ganache becomes firm enough to hold its shape but remains soft enough to enjoy with the creamy mousse underneath.
Ingredients You’ll Need
Chocolate and cocoa powder
Chocolate is the main ingredient in all three layers, so its flavor has a major influence on the finished cake. Unsweetened chocolate is used for the brownie base, giving it a deep cocoa flavor that balances the granulated sugar. Semisweet chocolate is used in the mousse and ganache, providing a smoother and slightly sweeter taste.
Dutch-process cocoa powder is another important ingredient in the brownie. It contributes a darker color and a mellow chocolate flavor. Natural cocoa powder can also be used if necessary. Chopping the chocolate into small pieces before melting helps it combine more evenly with the warm butter and cream.
Butter and granulated sugar
Unsalted butter gives the brownie its rich flavor and tender texture. Melting it together with the unsweetened chocolate creates the smooth foundation for the batter. Unsalted butter is useful because it allows you to control the saltiness of the recipe without introducing additional salt from the butter itself.
Granulated sugar sweetens the brownie and balances the strong flavor of unsweetened chocolate. Whisking it into the warm melted chocolate mixture helps distribute it throughout the batter. The sugar also contributes to the brownie’s final texture, helping create a dense, moist layer beneath the mousse.
Eggs, flour, vanilla, and salt
Three large eggs provide structure and help bind the brownie ingredients together. Room-temperature eggs are easier to incorporate into the batter, creating a more even mixture. Allow the melted chocolate and butter to cool slightly before adding the eggs so they do not begin cooking from the residual heat.
All-purpose flour gives the brownie enough structure to support the mousse. Vanilla extract adds a warm flavor that complements the chocolate, while salt balances the sweetness and enhances the other ingredients. Sifting the flour, cocoa powder, and salt before adding them to the chocolate mixture helps distribute the dry ingredients evenly.
Heavy cream and gelatin
Heavy cream is essential for both the mousse and ganache. Cold cream whips more effectively, allowing it to form the soft peaks needed for an airy mousse. Another portion is heated with sugar and combined with the semisweet chocolate and softened gelatin to create the chocolate base for the filling.
Gelatin helps the mousse remain stable after refrigeration. It is first sprinkled over water and left to soften before being dissolved in the warm cream. This preparation helps prevent lumps and allows the gelatin to distribute throughout the chocolate mixture, supporting the filling without taking away its creamy texture.
How to Make Triple Chocolate Mousse Cake
Step 1: Prepare the brownie base
Start by preheating your oven to 350°F (175°C). Lightly grease the bottom and sides of an 8-inch springform pan, then line it with parchment paper. Lightly grease the parchment as well to make removing the cake easier after chilling. Preparing the pan carefully is particularly important because the finished dessert has delicate mousse and ganache layers.
Add the chopped unsweetened chocolate and unsalted butter to a medium saucepan. Warm them over medium-low heat, stirring constantly until the chocolate melts completely and the mixture becomes smooth. Remove the saucepan from the heat and whisk in the granulated sugar. Let the mixture cool slightly before adding the eggs.
Whisk the room-temperature eggs and vanilla extract into the cooled chocolate mixture until combined. Sift the flour, cocoa powder, and salt into the saucepan. Use a rubber spatula to fold the dry ingredients into the wet mixture until no visible flour remains. Avoid excessive mixing because it can make the brownie dense and tough instead of tender and fudgy.
Spread the batter evenly across the bottom of the prepared springform pan. Bake for 20–25 minutes, or until a toothpick inserted into the center comes out with a few moist crumbs. The brownie should be set but should not become dry. Leave it in the pan and place it on a wire rack to cool completely before adding the mousse.
Step 2: Prepare the chocolate mousse
While the brownie cools, prepare the mousse filling. Sprinkle the gelatin over one tablespoon of water in a small bowl and allow it to stand for five minutes. This gives the gelatin time to absorb the water and soften before it is added to the warm cream.
Place the chopped semisweet chocolate in a medium heatproof bowl. In a small saucepan, combine half a cup of heavy cream with two tablespoons of granulated sugar. Heat over medium-high heat until the mixture reaches a simmer, stirring until the sugar dissolves. Remove the saucepan from the heat and stir in the softened gelatin until it has completely dissolved.
Pour the warm cream mixture over the chopped chocolate. Whisk gently until the chocolate melts and the mixture becomes smooth and glossy. Allow it to cool to room temperature, stirring occasionally. The mixture may become slightly thicker as it cools, but it should still be soft enough to combine with the whipped cream.
Pour the remaining cold heavy cream into a mixing bowl. Using a stand mixer fitted with a whisk attachment or a handheld electric mixer, whip the cream at medium speed until it begins to thicken. Increase the speed to high and continue whipping until medium to stiff peaks form. Watch the cream carefully so it does not become overwhipped or grainy.
Whisk approximately one-third of the whipped cream into the cooled chocolate mixture to lighten it. Then gently fold in the remaining whipped cream with a rubber spatula. Continue folding until the mousse has an even color and no visible streaks remain. Spread it evenly over the completely cooled brownie base and refrigerate while preparing the ganache.
Step 3: Make the chocolate ganache
The ganache is the final layer and gives the cake its smooth, professional-looking finish. Place the chopped semisweet chocolate in a medium heatproof bowl. In a saucepan, heat the heavy cream and unsalted butter over medium-high heat. Remove the saucepan from the stove just before the cream begins to boil.
Pour the hot cream mixture over the chopped chocolate. Allow it to sit briefly so the chocolate begins melting, then stir gently until the mixture becomes completely smooth. Continue stirring until the butter is fully incorporated and the ganache has a consistent, glossy appearance.
Allow the ganache to cool until it is no longer warm to the touch. It should still be spreadable but should not be hot enough to soften the mousse underneath. Pour it over the chilled mousse and spread it gently into an even layer, reaching the edges of the cake.
Return the cake to the refrigerator and chill for approximately one hour, or until the ganache is set. Once the topping is firm, carefully remove the sides of the springform pan and peel away the parchment paper. Transfer the cake to a serving platter, keeping the layers intact.
Tips for Perfect Results
Use an 8-inch springform pan
An 8-inch springform pan that is approximately three inches tall is the recommended size for this recipe. Its removable sides make it easier to release the finished cake without disturbing the mousse or damaging the ganache. Lining the pan with parchment paper also helps keep the cake from sticking to the sides.
If you use a larger pan, the layers will be thinner and the brownie may bake faster. A regular 8-inch cake pan can also work, but removing the finished cake will require additional care. Chilling it until firm before unmolding can help prevent the delicate layers from breaking.
Cool the chocolate before adding cream
The chocolate mixture used for the mousse should reach room temperature before you fold in the whipped cream. If it is too warm, it can melt the cream and cause the mousse to lose its airy consistency. Stirring the chocolate occasionally as it cools helps maintain a smooth texture and prevents it from becoming too firm.
Whip the cream carefully
The consistency of the whipped cream determines how the mousse feels when served. Cream that is too soft may not provide enough structure, while cream that is overwhipped can make the filling grainy. Aim for medium to stiff peaks that hold their shape but still look smooth and creamy.
Allow enough chilling time
Chilling is essential for creating clean layers and making the cake easier to slice. The brownie must cool completely before the mousse is added, and the mousse needs time to firm up before the ganache is spread on top. After adding the ganache, refrigerate the cake until the topping is fully set before removing the pan.
Serving and Decoration Ideas
Triple Chocolate Mousse Cake looks impressive without complicated decoration. Its smooth ganache topping and visible layers provide an attractive presentation on their own. For special occasions, serve each slice with a few fresh strawberries, raspberries, or other berries. Their freshness and slight tartness provide a pleasant contrast to the rich chocolate.
Whipped cream is another simple accompaniment that works well with the cake. You can serve a small spoonful alongside each slice or use it as a light topping. For a clean presentation, keep the decoration simple and allow the three chocolate layers to remain the main attraction.
For neat slices, use a sharp knife and wipe the blade between cuts. Slice the cake while it is thoroughly chilled, when the mousse and ganache are firm. After cutting, let each serving sit at room temperature for approximately 30 minutes. This softens the layers slightly and makes the mousse and ganache feel silkier.
Make-Ahead and Storage Instructions
Make the cake a day ahead
This dessert is a convenient choice for celebrations because it can be prepared in advance. The mousse and ganache both need time to chill, so making the cake the day before serving allows the layers to become firm and stable. Once assembled, cover the cake and refrigerate it until you are ready to serve.
The cake can be stored in the refrigerator for up to three days. Keep it covered to protect the ganache and prevent the dessert from absorbing unwanted odors. For the best texture, cut slices while the cake is cold and let them soften slightly before eating.
Freeze for longer storage
Triple Chocolate Mousse Cake can also be frozen for up to three months. Make sure the ganache has fully set before wrapping the cake securely. Protecting it from air and moisture helps preserve its texture and prevents it from picking up freezer odors.
When you are ready to serve, thaw the cake overnight in the refrigerator. Avoid leaving the entire cake at room temperature for an extended period. Slice it while chilled, then allow the portions to rest briefly before serving if you prefer a softer texture.
Frequently Asked Questions
Can I make triple chocolate mousse cake the day before?
Yes. Making the cake the day before is a practical option because the mousse and ganache need sufficient chilling time. Keep it covered in the refrigerator overnight and serve it the following day. The extra resting time also makes the layers easier to cut and present neatly.
Can I use a regular cake pan?
Yes, a regular 8-inch round cake pan approximately three inches tall can be used. However, removing the finished cake is more difficult because the sides cannot be released. Freezing the cake until firm before carefully turning it out can help protect the mousse and ganache.
Can I use a larger pan?
The recipe is designed for an 8-inch pan. A 9-inch or 10-inch pan will make the layers thinner and may change the brownie baking time. Check the brownie early if you use a larger pan, and remember that the finished cake will have a different appearance.
Triple Chocolate Mousse Cake Dessert
Rich brownie base, creamy chocolate mousse, and smooth semisweet ganache.
16
servings40
minutes35
minutes477
kcal80
minutes2
hours35
minutesIngredients
- For the brownie base
6 ounces (170 g) unsweetened chocolate, coarsely chopped
½ cup (113 g) unsalted butter, cut into pieces
1 cup (200 g) granulated sugar
3 large eggs, room temperature
1 tablespoon pure vanilla extract
1 cup (130 g) all-purpose flour
3 tablespoons Dutch-process cocoa powder
½ teaspoon salt
- For the chocolate mousse
¾ teaspoon gelatin
1 tablespoon water
6 ounces (168 g) semisweet chocolate, coarsely chopped
1½ cups (360 ml) heavy cream, cold
2 tablespoons granulated sugar
- For the chocolate ganache
¾ cup (180 ml) heavy cream
1 tablespoon unsalted butter
9 ounces (252 g) semisweet chocolate, coarsely chopped
Directions
- Prepare and bake the brownie
- Preheat the oven to 350°F (175°C). Grease an 8-inch springform pan, line the bottom and sides with parchment paper, and lightly grease the paper.
- Melt the unsweetened chocolate and butter together in a saucepan over medium-low heat, stirring until smooth.
- Whisk in the sugar and allow the mixture to cool slightly. Add the eggs and vanilla, whisking until combined.
- Sift the flour, cocoa powder, and salt into the chocolate mixture. Fold gently until no dry streaks remain.
- Spread the batter evenly into the pan. Bake for 20–25 minutes, until a toothpick inserted in the center comes out with a few moist crumbs.
- Cool the brownie completely in the pan.
- Prepare the chocolate mousse
- Sprinkle the gelatin over one tablespoon of water and let it soften for five minutes.
- Place the chopped semisweet chocolate in a heatproof bowl. Heat ½ cup of heavy cream with the sugar until simmering and the sugar dissolves.
- Remove from the heat, stir in the softened gelatin until dissolved, and pour the hot cream over the chocolate.
- Whisk until smooth and let the chocolate mixture cool to room temperature, stirring occasionally.
- Whip the remaining one cup of cold cream until medium to stiff peaks form.
- Whisk one-third of the whipped cream into the chocolate mixture. Gently fold in the rest until combined.
- Spread the mousse over the cooled brownie base and refrigerate while making the ganache.
- Make the ganache
- Heat the heavy cream and butter in a saucepan over medium-high heat. Remove just before the cream boils.
- Pour the hot cream over the chopped semisweet chocolate in a heatproof bowl.
- Stir until completely melted and smooth. Cool until no longer warm to the touch.
- Spread the ganache evenly over the mousse layer.
- Refrigerate for approximately one hour, until set.
- Remove the springform sides and carefully peel away the parchment paper. Transfer to a serving platter and garnish with whipped cream or fresh berries if desired.
Nutrition Facts
- Calories: 477kcal
- Fat: 35g
- Carbohydrates: 39g
- Fiber: 4g
- Sugar: 25g
- Protein: 6g


